Ball Pass Circuit – Southern Alps New Zealand

Over the past six months my 15 year old son Joe has taken a strong interest in mountain climbing.  He has been actively researching data and information on the tallest peaks in different countries and looking at opportunities for climbing.  Joe soon learnt that he would have to accumulate an assortment of specialist equipment, items and clothing required to undertake this activity and gain relevant skills and experience; all of which would take time and cost money.

As parents we have been supporting Joe as much as possible in his latest endeavours.  Joe has also made a big effort himself.  Some of his clothing such as base layers, fleece, down and a gortex jacket was discounted by sponsorship from Katmandu outdoor and camping store after he was successful in an application.  His earnings from part time work at a local restaurant have helped fund other items.

Many of Joe’s dream mountain climbs, including Mt Cook and Mt Aspiring NZ, were not yet reachable. Australia does not provide real mountaineering opportunities so overseas travel would be necessary.

Therefore at this stage we wanted a basic mountaineering experience that would be realistic and affordable for us at a suitable location in New Zealand.  Something that would test and challenge us but not expose us to an unacceptable level of risk.

Joe wanted to do Ball Pass at Aoraki/Mt Cook National Park.  Ball Pass Crossing is a demanding three-day alpine route, crossing the Mount Cook Range between the Hooker and Tasman Valleys. Between Dec and Feb in the right weather conditions it looked possible.

There are numerous great walks in New Zealand most notably the Routeburn, Milford Track and Kepler Tracks.   Ball Pass is less known but considered by many to be the pinnacle of New Zealand walks.  Ball Pass provides close up views of the Hillary Ridge and South Face of Aoraki Mount Cook and its ice avalanches, beautiful alpine grasslands, boulder fields and steep scree slopes.  The route also provides spectacular views of Mt Sefton, the Copland Pass and the Hooker and Tasman Glaciers. We decided to go for it.

Map showing route walked.  Click to enlarge.
Map showing route walked. Click to enlarge.

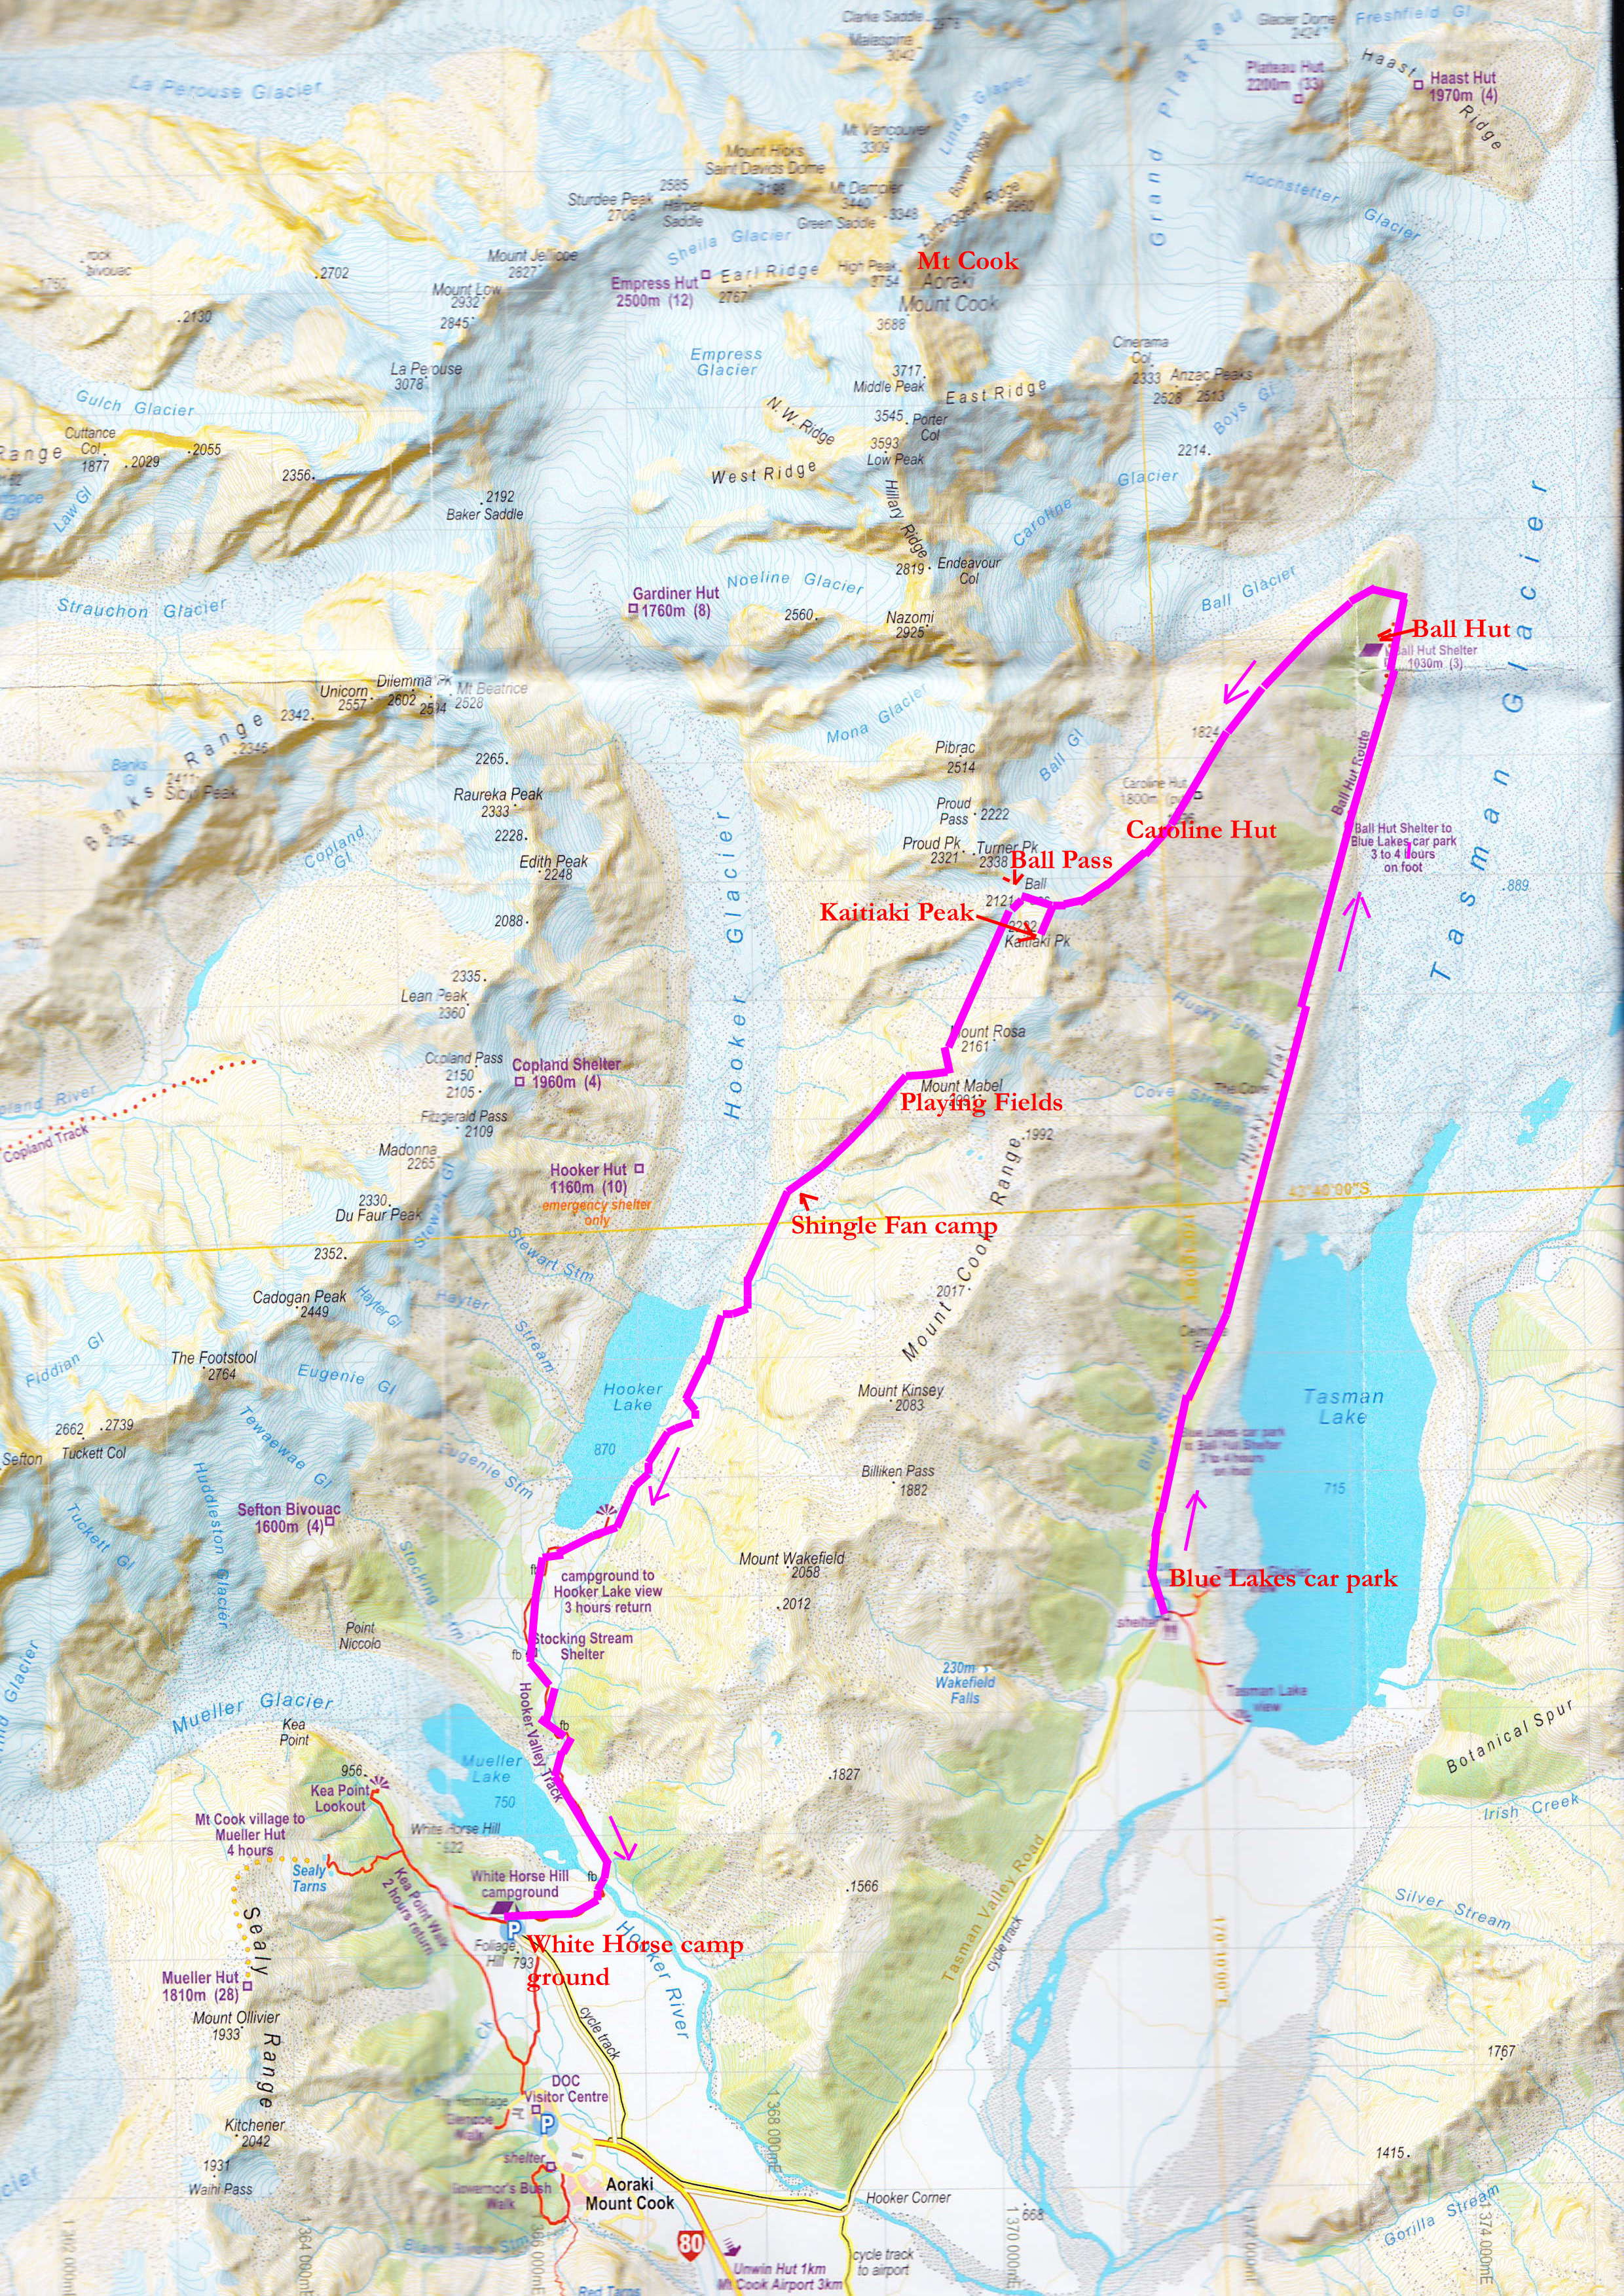
The recommended route is to start at the White Horse Hill camping area and travel up the East Hooker, over Ball Pass (sidling around under Mounts Rosa and Mabel) and down the Ball Ridge to the Tasman Valley and Ball Hut. However we decided to do the walk in reverse, starting at Blue Lakes carpark – Tasman Valley and finishing back at White Horse Hill camping area.  This was because we weren’t sure of our ability to tackle the snow/ice conditions at the Pass and if we decided to turn back it would be a less demanding walk back.

We set off at 9:00 AM the Monday morning after flying into Christchurch and driving our hire car to Mt Cook (Monday 8 Dec 2014).  The weather report obtained from the Mt Cook information centre was for good weather on the 1st day with rain forecast late on the 2nd day and occasional showers on the 3rd day.  This wasn’t ideal but locals also said that because the rain was approaching from the west it may not reach us over the Copland Range.  What we didn’t know about was the wind warning for Tuesday!  We arrived mostly self sufficient including a Macpac four season tent and locator beacon.  The only items we sought in NZ were ice axes and crampons hired from Alpine Guides Mt Cook and Backcountry dehydrated food purchased at Christchurch.

Ball Pass website -2
Day 1. At the start of our walk.

Ball Pass website -1

We set off from Blue Lakes carpark – Tasman Valley at 9.00 AM (720m) and walked for 3 hrs to Ball Hut (1030 m) where we filled up our water containers.  Shortly afterwards we stopped for a quick lunch and break before the steep climb up Ball Ridge to the south west.  We could not find a marked route or much of a worn trail on Ball Ridge.  It was a case of negotiating the boulder scree and picking a way through the alpine scrub.  We saw a few other walkers meandering up the slope lightly equipped for a day walk.  It appeared no one took the same path.  The day walkers must have soon turned around as we didn’t see them up ahead on the snow slopes.

Ball Pass website -3
Joe climbing up a boulder scree on lower Ball Ridge adjacent to Ball Hut. Click to enlarge.
Ball Pass website -4
From Ball Ridge looking at the upper Tasman Glacier. Click to enlarge.

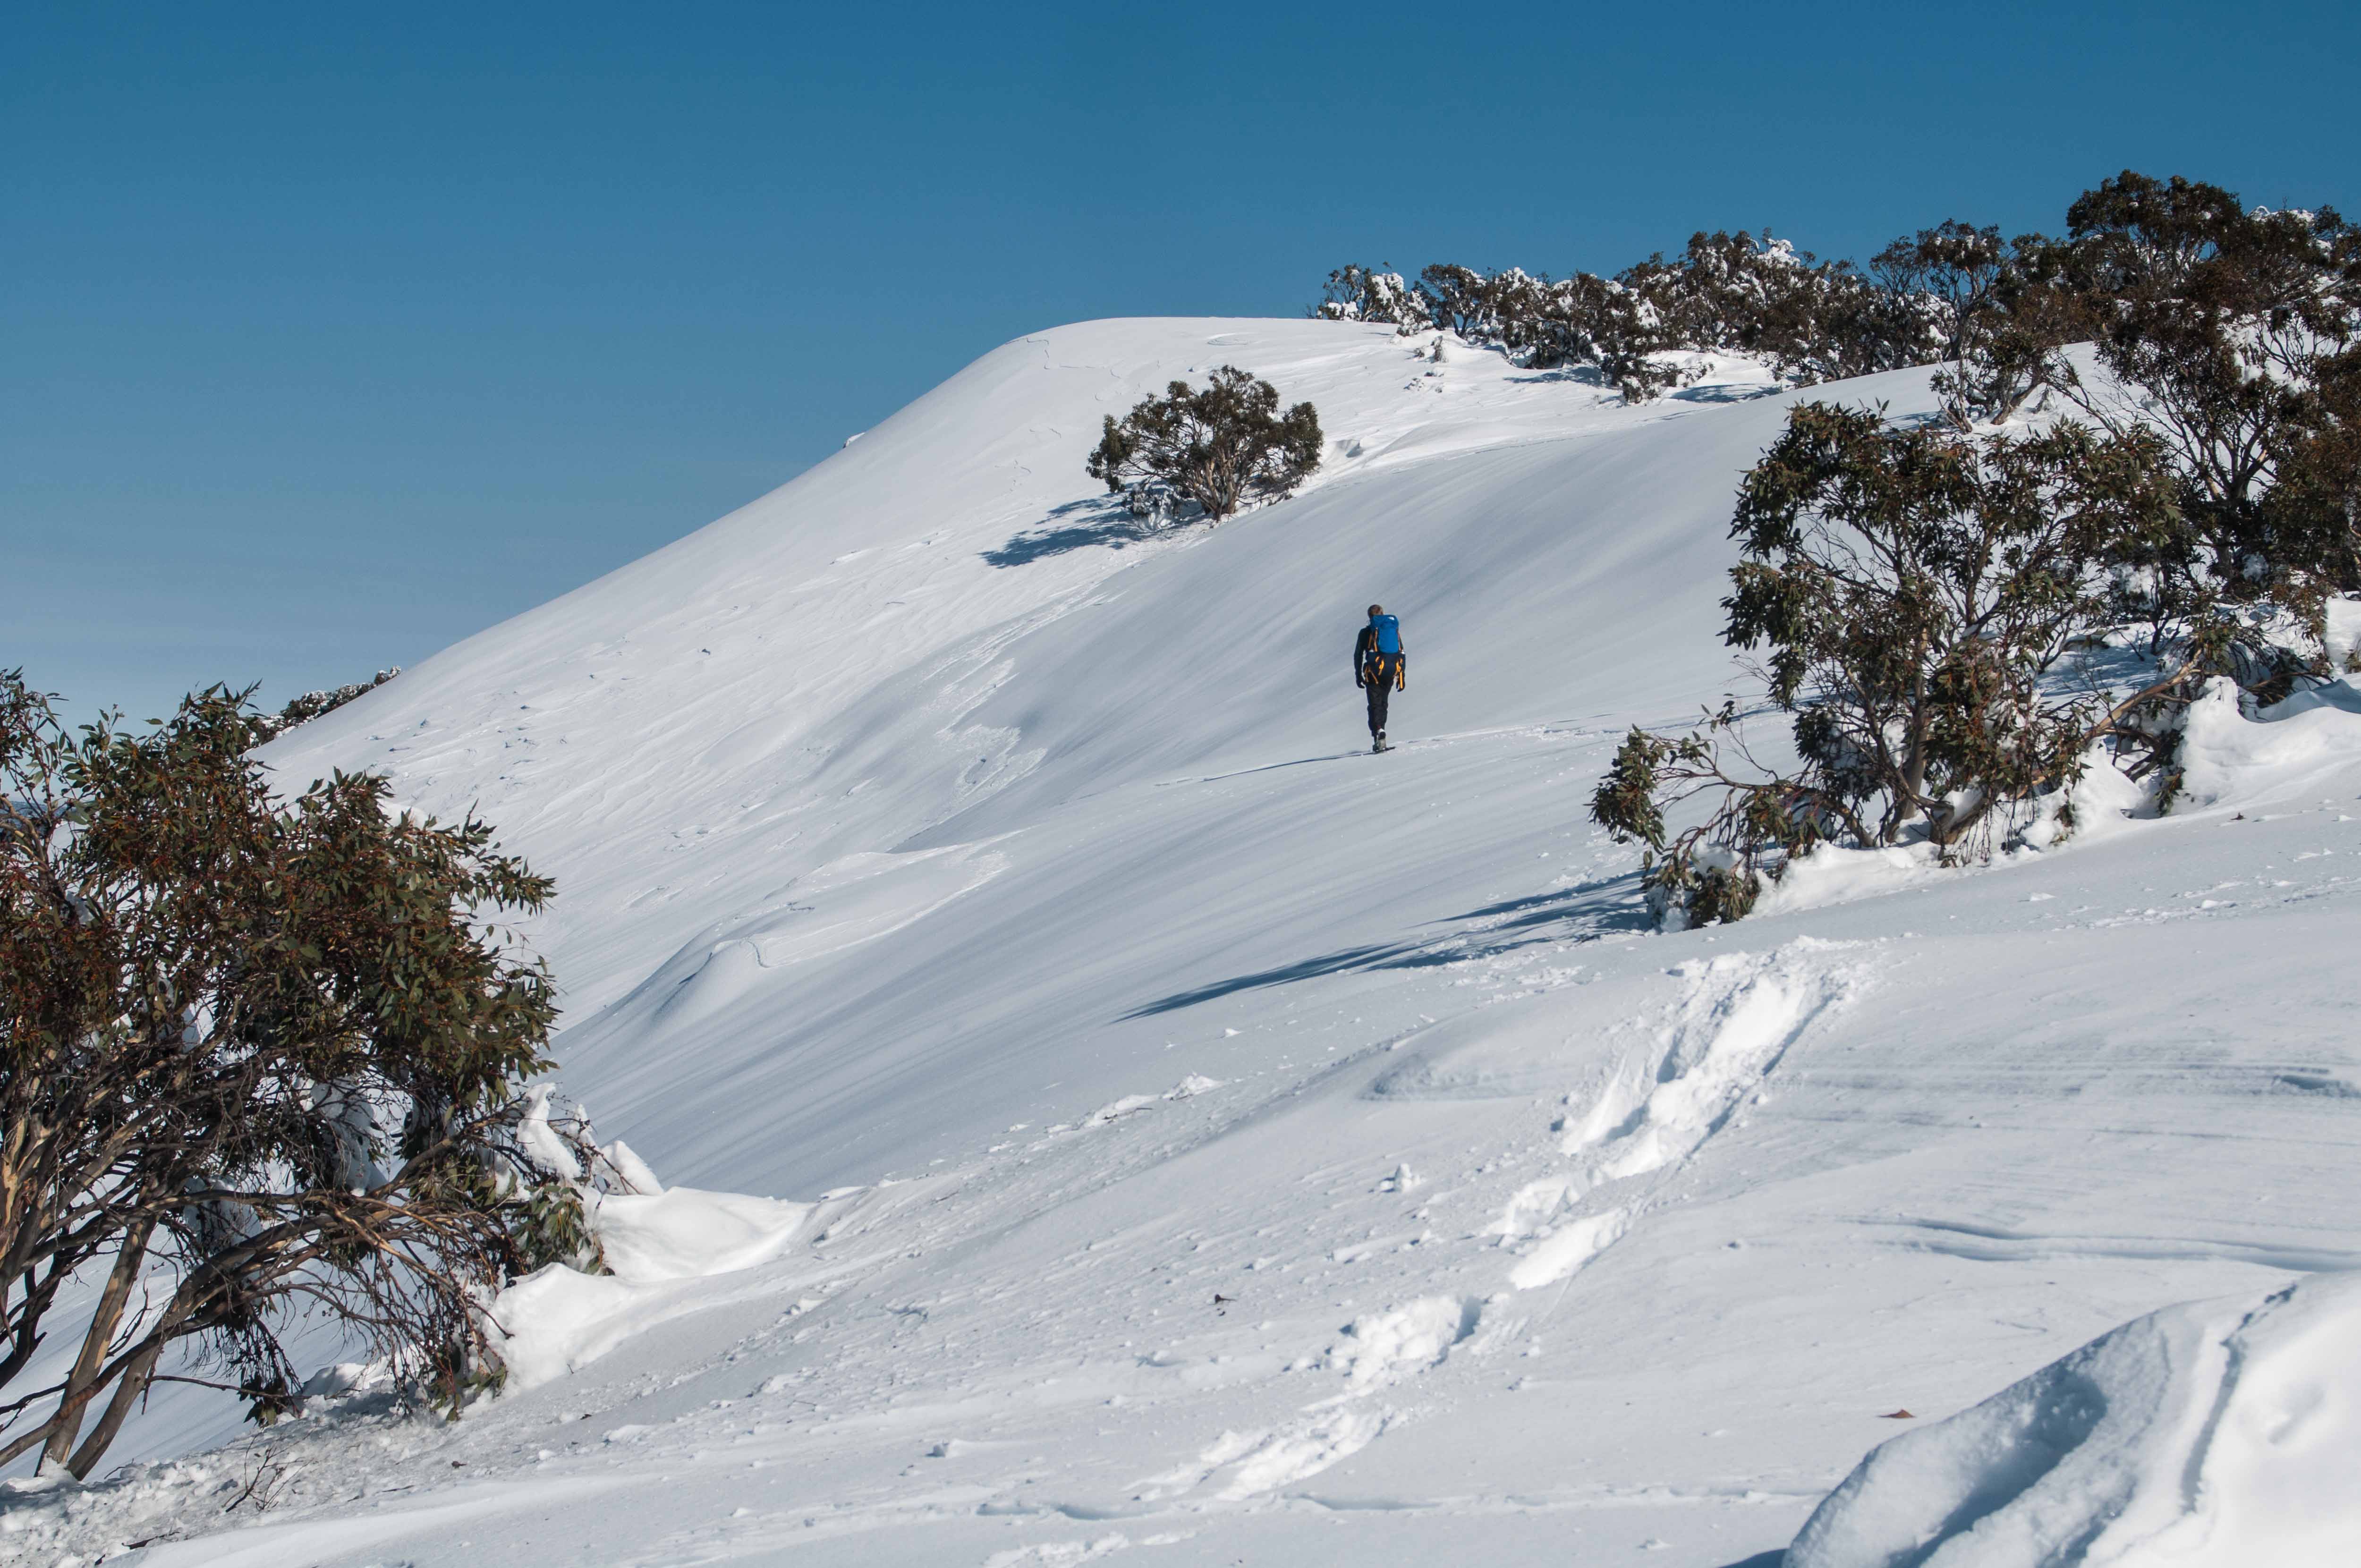
At about 2.00PM we bumped into a guide leading two clients from South Australia to Caroline Hut for the night.  As there was no defined track Joe and I often took a different path across the boulders and rocks and along the ridgetop but our pace was similar to the other group as we stayed close together for the next three hours of climbing before arriving at Caroline Hut.  After 500 m (in elevation) of steep climbing my legs were starting to feel it so I was forced to reduce my speed to a sustainable pace which was quite slow.  Joe was obviously fitter and was always up ahead.

Ball Pass website -5
Me and Joe on Ball Ridge at 1800 m. Click to enlarge.

Around 3.00PM we met two young women in their twenties who had just crossed the Pass from west to east and were on their way down to Ball Shelter for the second night.  They had camped at ‘Playing Fields’ on the west side the previous night and reported that conditions for crossing the Pass was good and commented that we will find it easier walking down the snow slopes below Mt Rosa and Mabel than what they did having to climb up the snow slopes.  Similarly they were moving quicker than us as they were going down Ball Ridge! Being one day ahead of us they had a better weather window than us and would be back to the car park well before any rain (and wind). We would not be crossing Ball Pass that day so we hoped for the good conditions to prevail.  We were to appreciate them leaving fresh footprints in the snow up ahead as this clearly showed the route to follow.

Ball Pass website -6
Not far to Caroline Hut. Hut seen at mid left. Click to enlarge.
Ball Pass website -7
Looking down Tasman Valley. Caroline Hut at right. Click to enlarge.

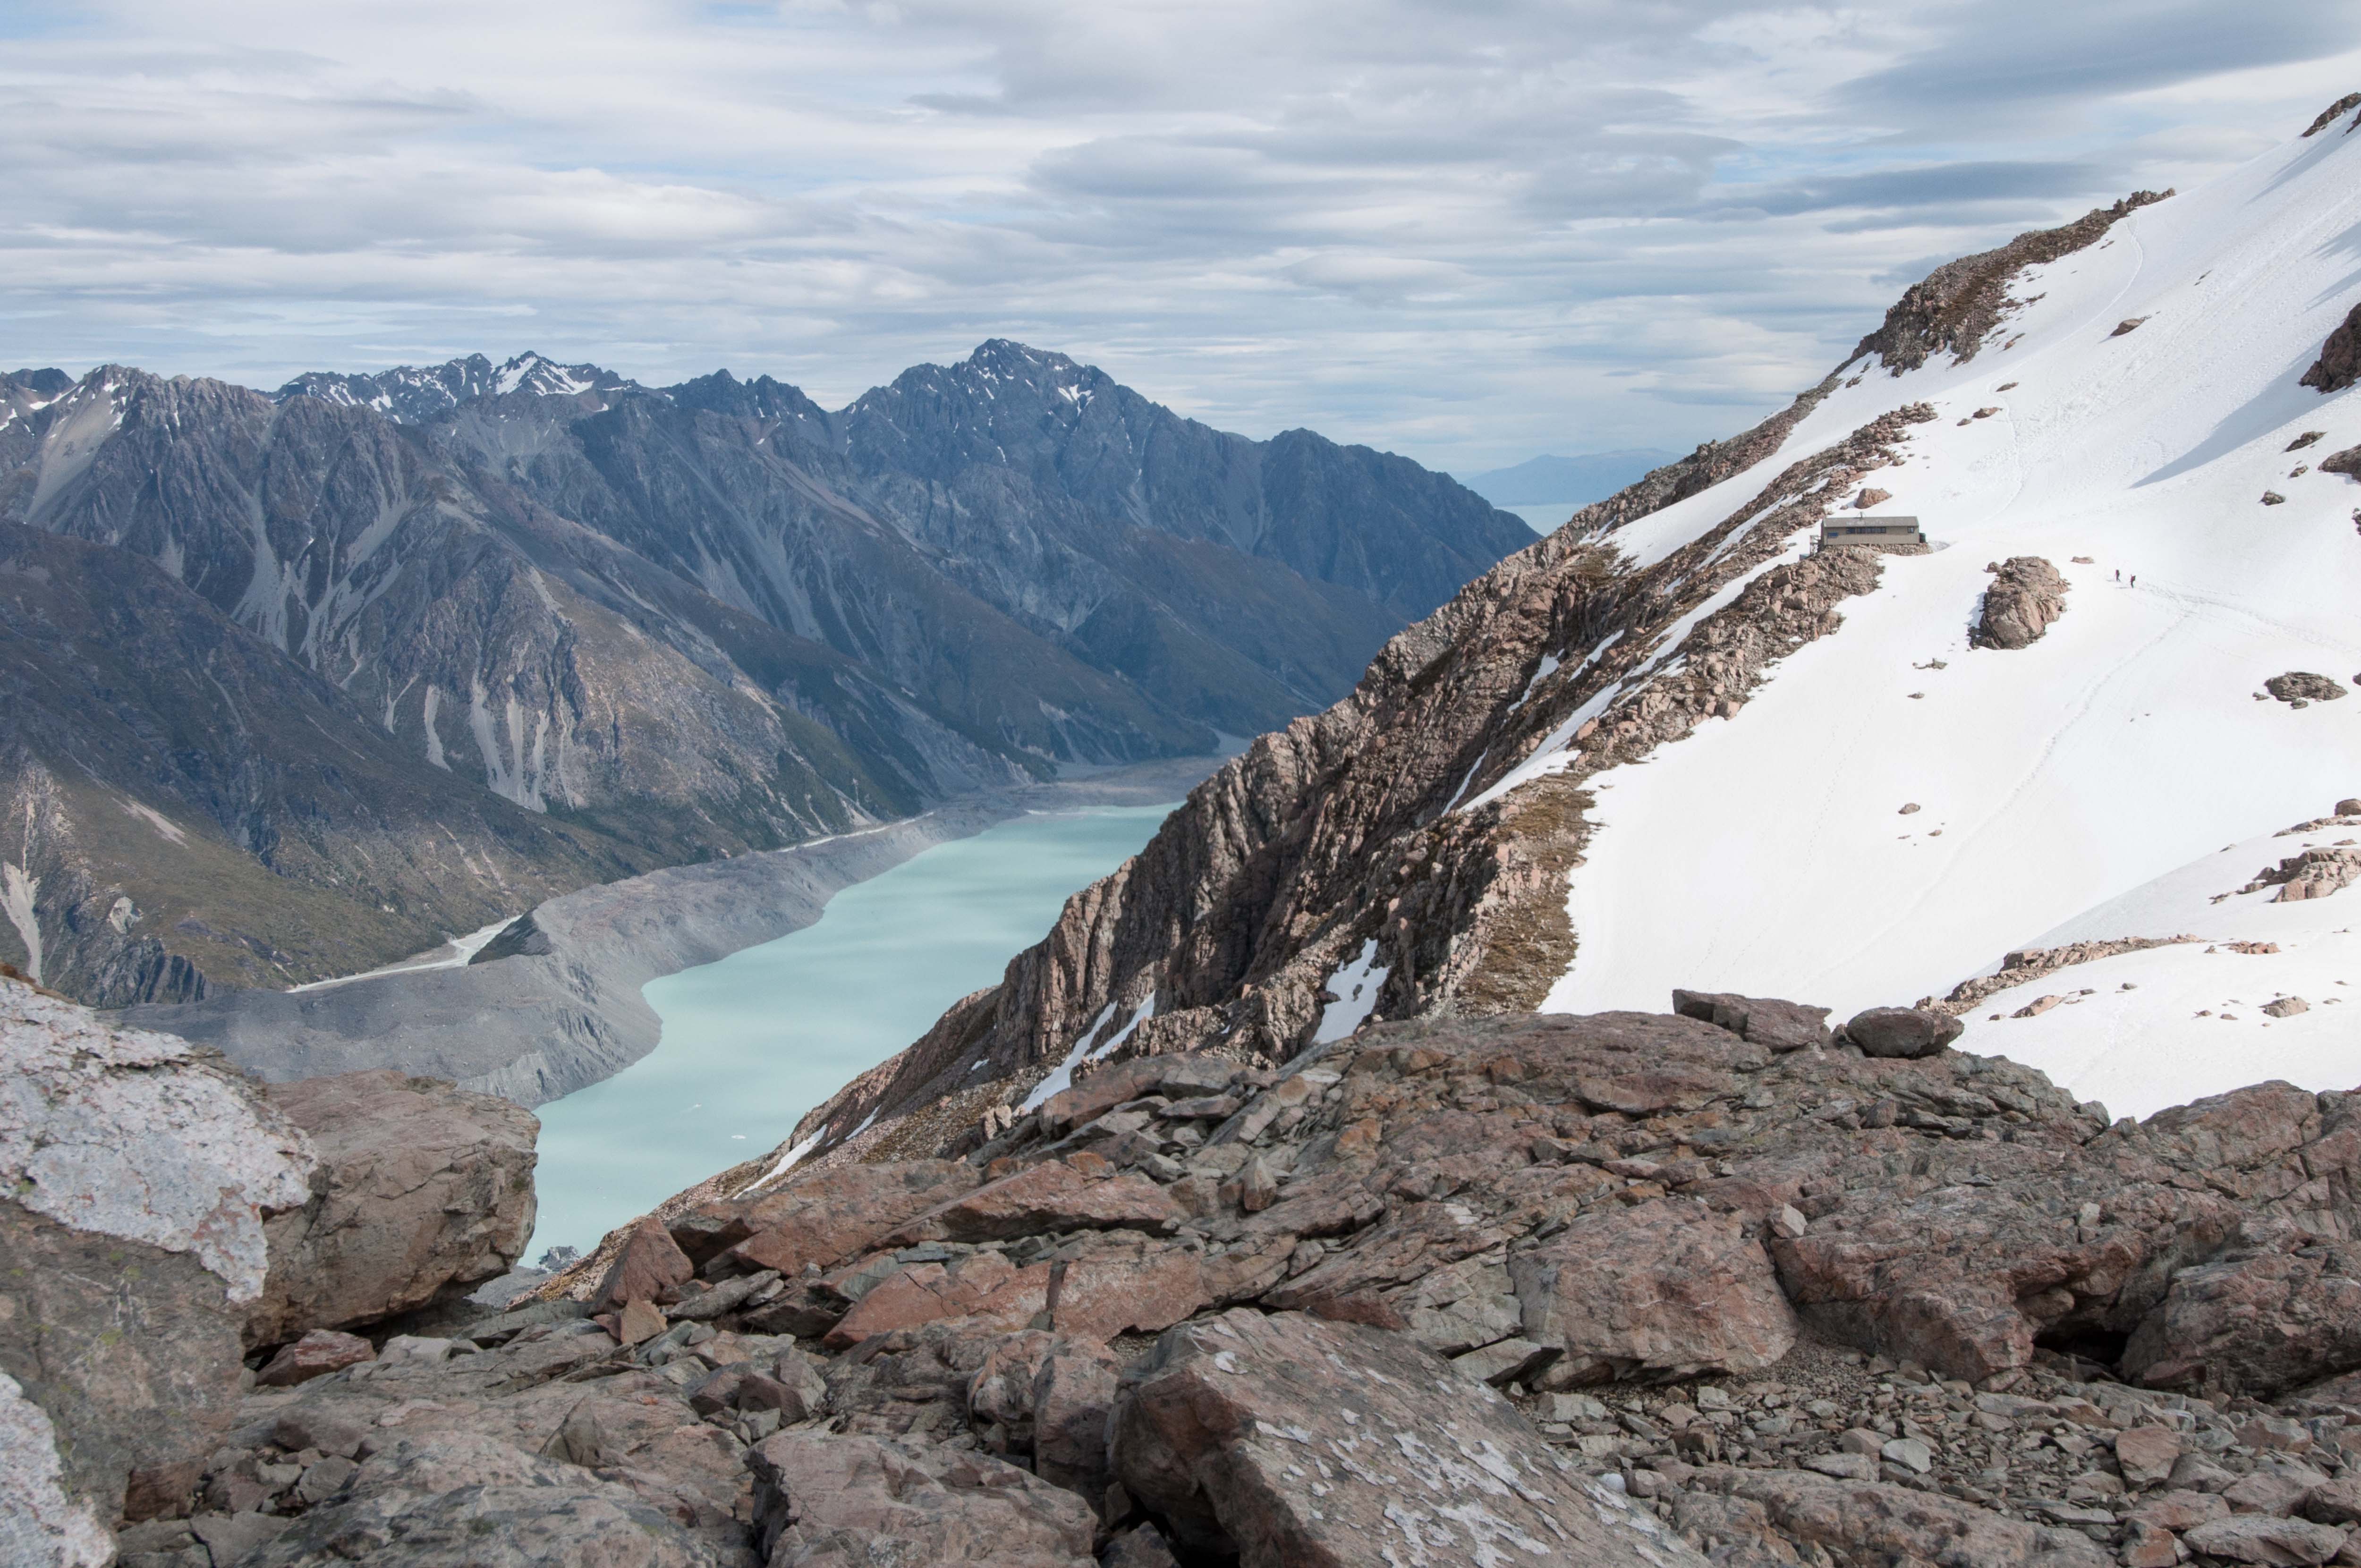
We reached Caroline Hut (1820m) at just past 5.00 PM.  There was another guided group staying at this private hut who was undertaking glacier training.  They kindly offered to fill our water containers and remarked how far we had come that day on hearing that we had departed from Blue Lakes carpark.  The Caroline Hut commercial operator has a key to the carpark gate and drive their clients about 7 klms up an old rough management track towards Ball Shelter.  This saves them about two hours walk.

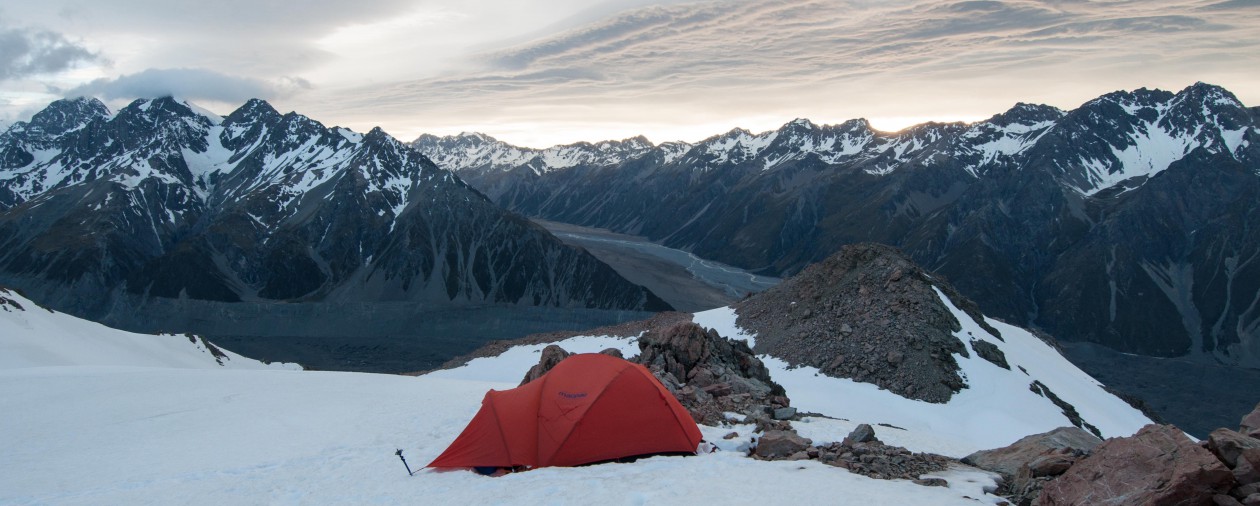
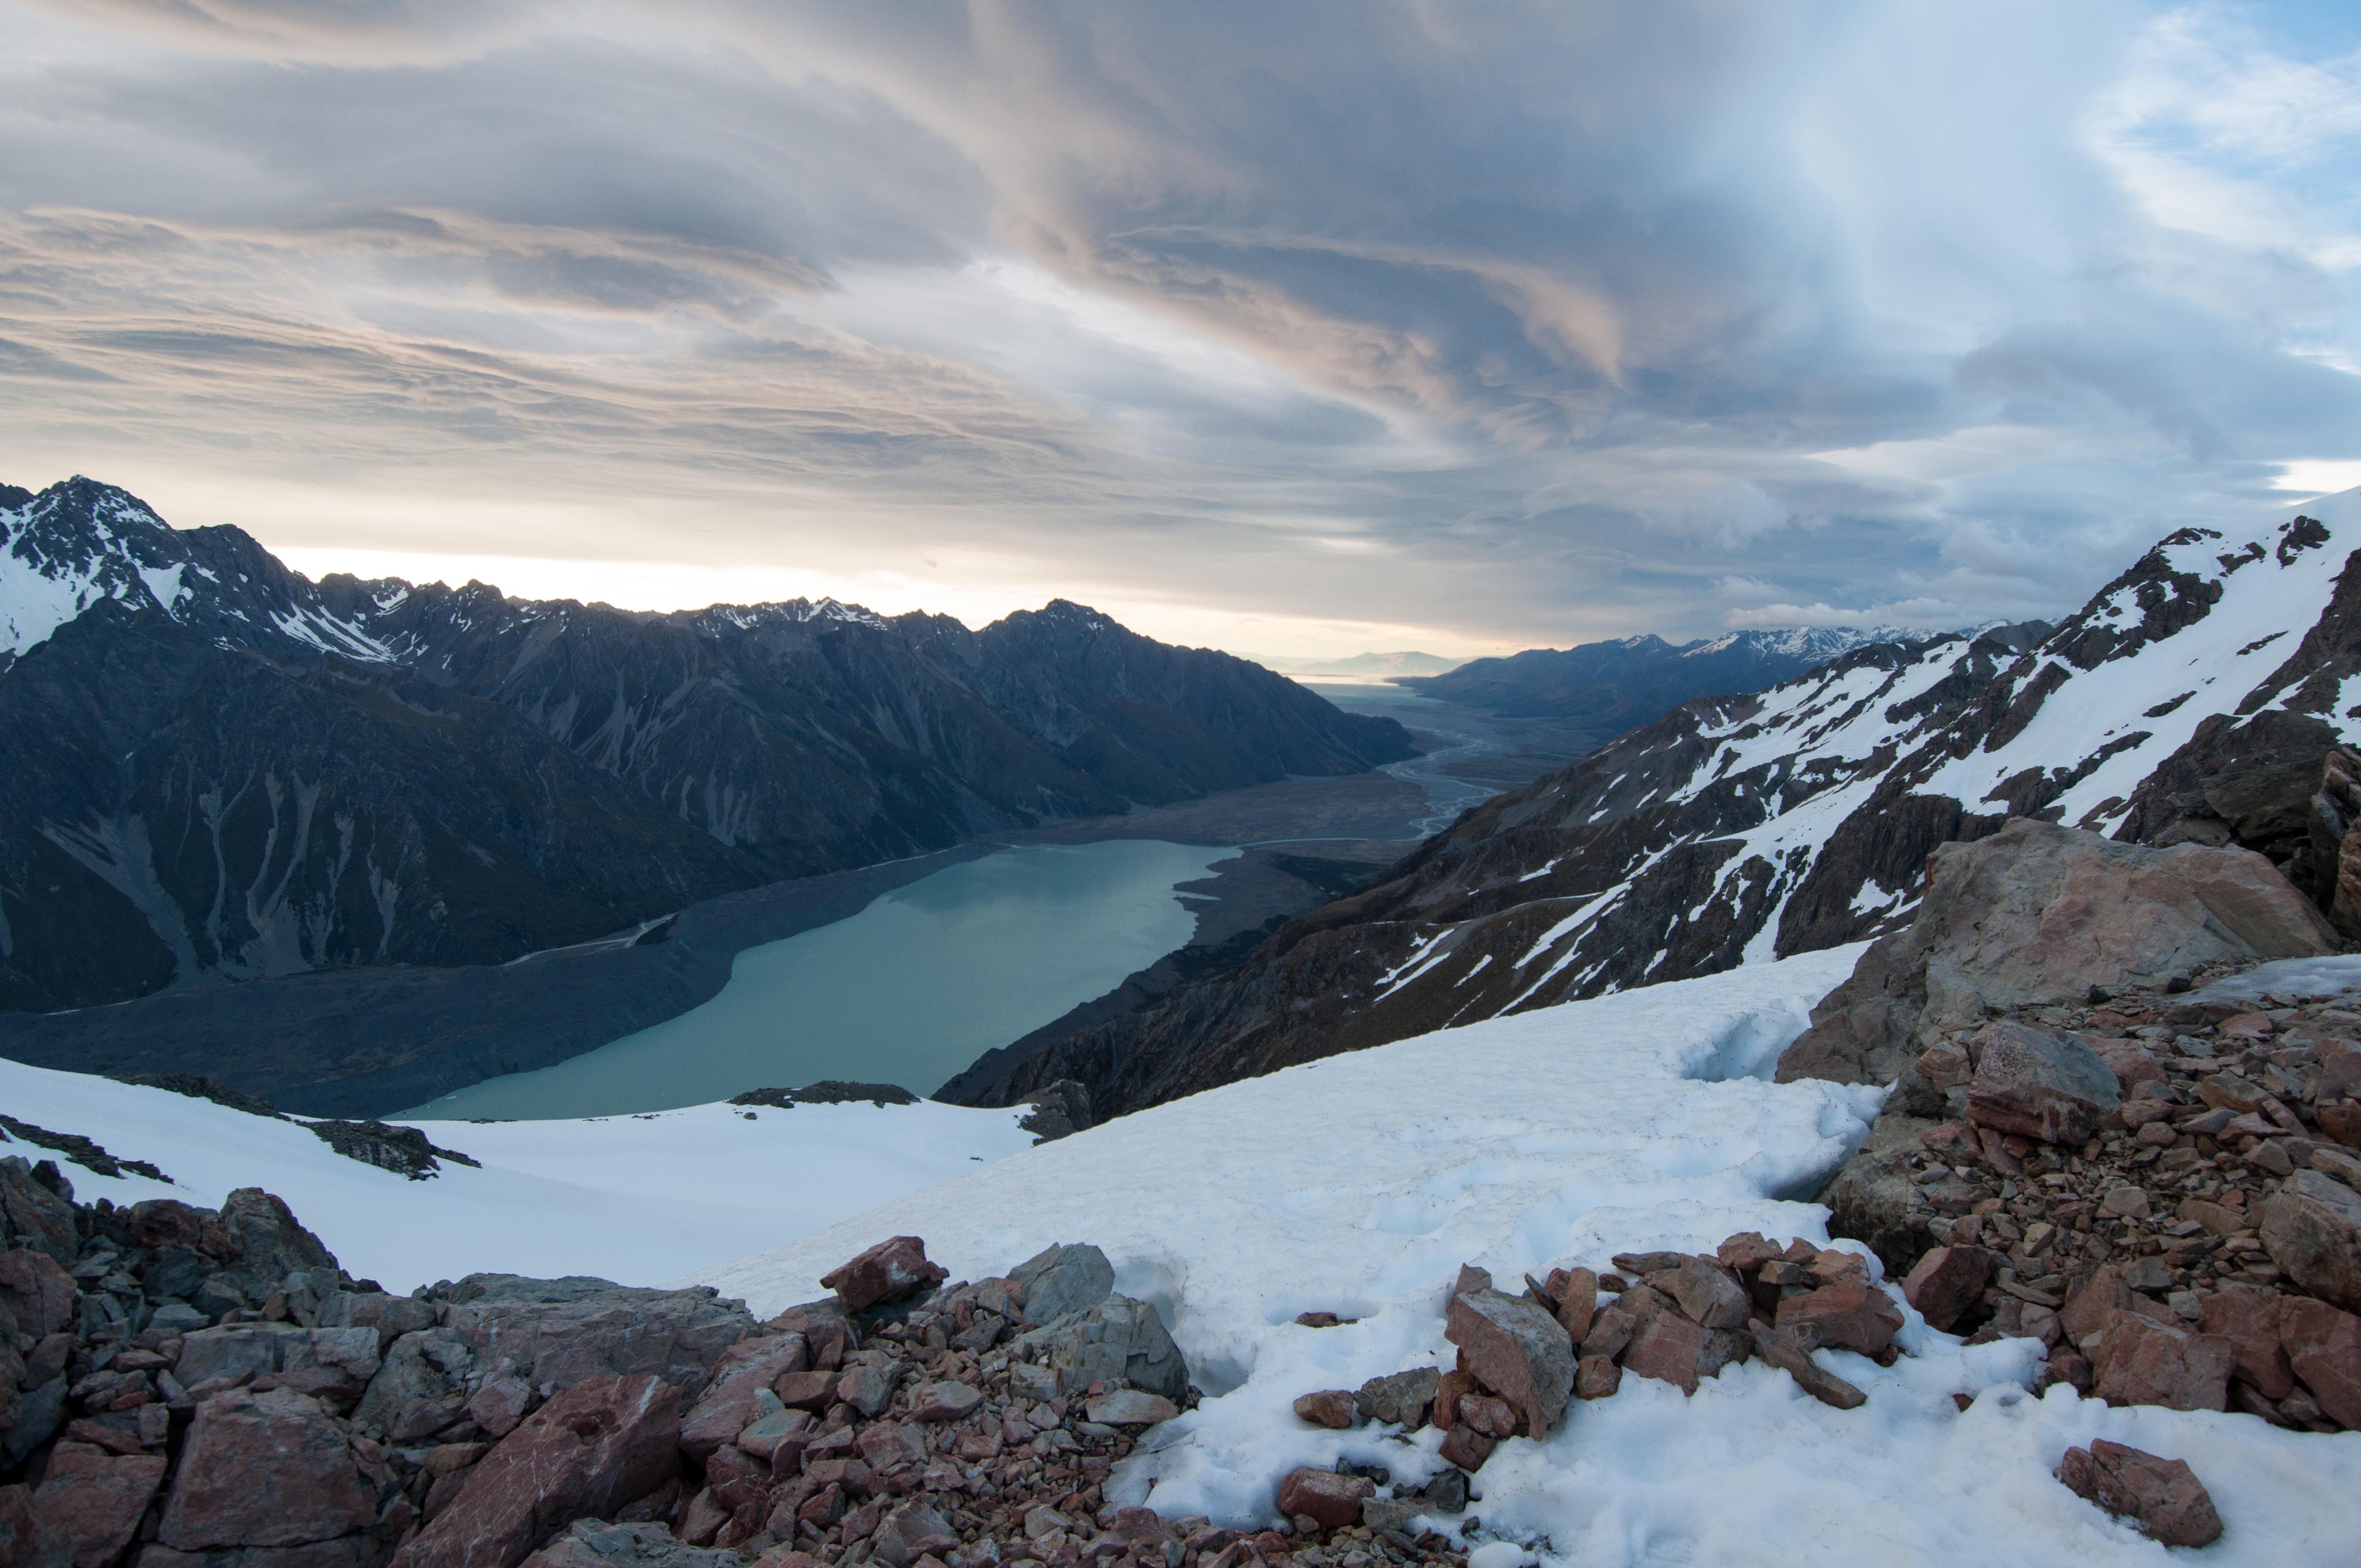
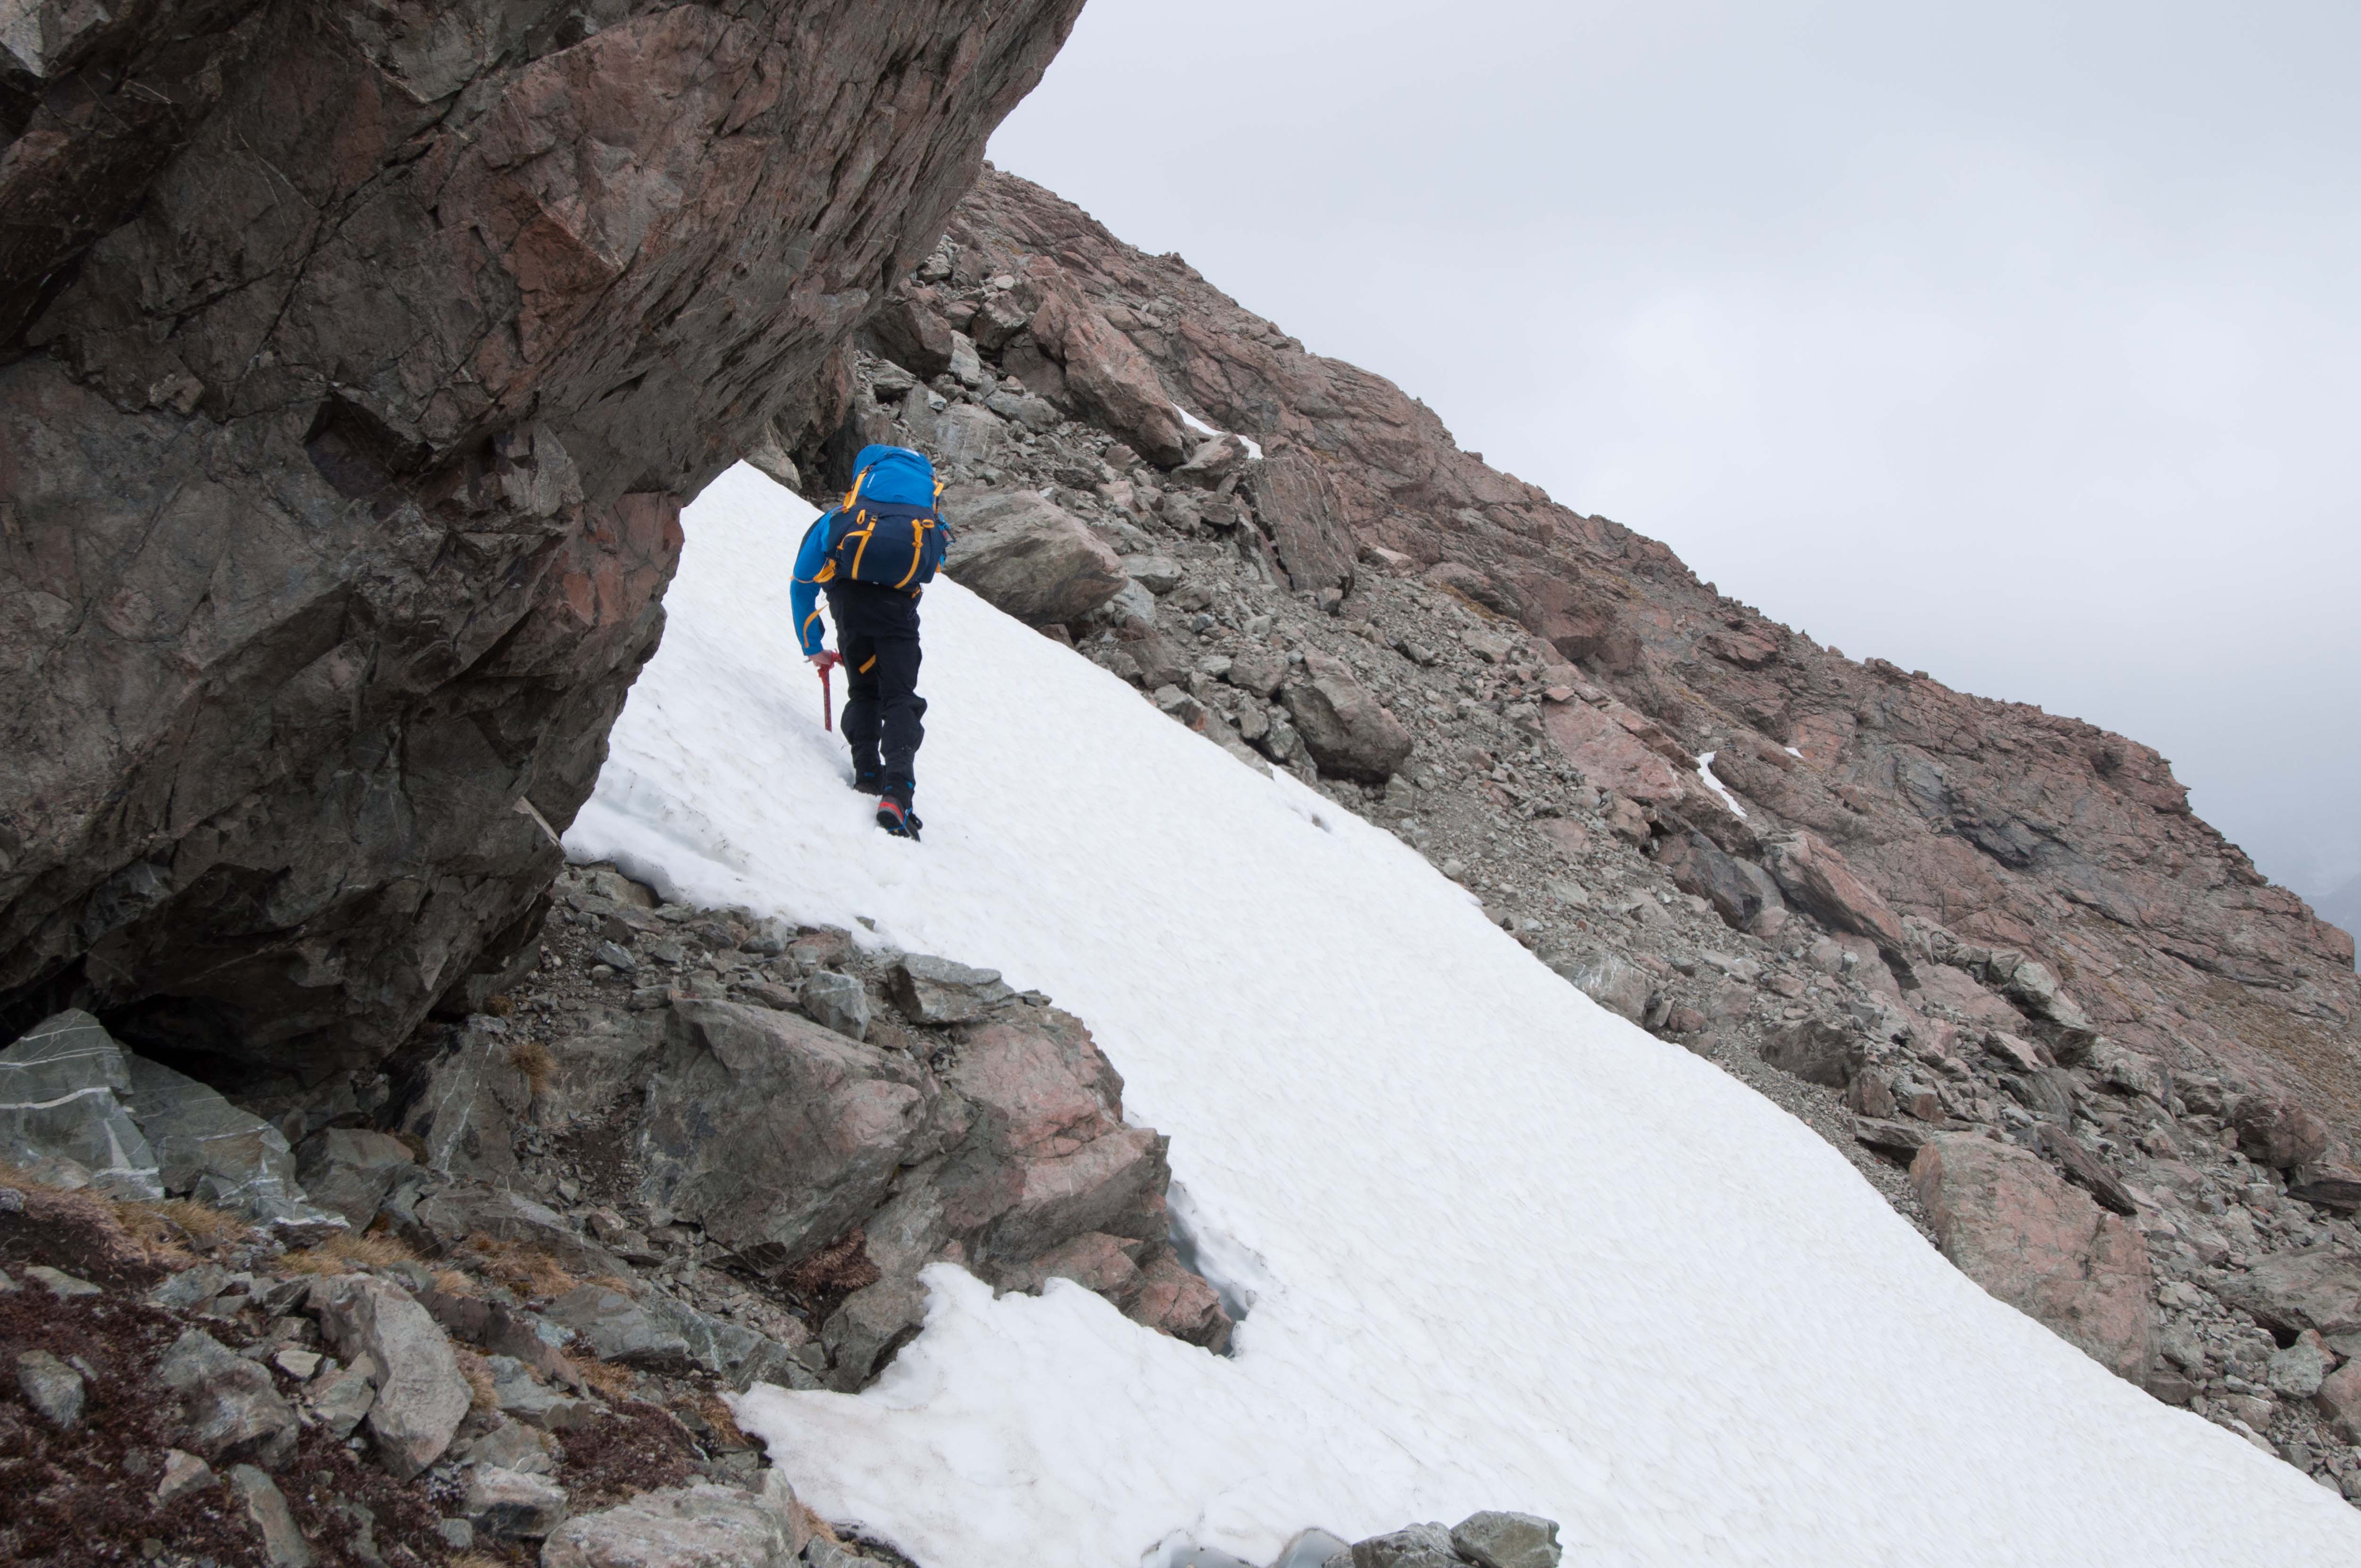
As they don’t like private campers near the private hut we had to keep going. The climb from Caroline Hut up directly along the ridge to gain Fergins Knob was very gruelling.  We stuck to the rock as much as possible as the snow slope was steep and disconcerting.  From Fergins Knob we identified a possible spot for our tent further ahead.  By 7.45 PM after excavating some snow to make a level surface we had our tent erected (1980 m).  It had been a tough first day with over 10 hours of walking.

Ball Pass website -8
Joe climbing up Caroline Face above Caroline Hut to Fergins Knob. Click to enlarge.
Ball Pass website -9
View from Fergins Knob (1920 m) towards Ball Pass (centre of picture on skyline). Click to enlarge.
Ball Pass website -10
The end of day 1. Tasman Lake in background. Click to enlarge.

We had mobile reception so was able to receive an updated weather report from home -“Rain coming tomorrow (Tuesday) afternoon after a cloudy morning. Westerlies rising to severe gale for a time. Wednesday rain or showers and snow lowering to 1500metres”.

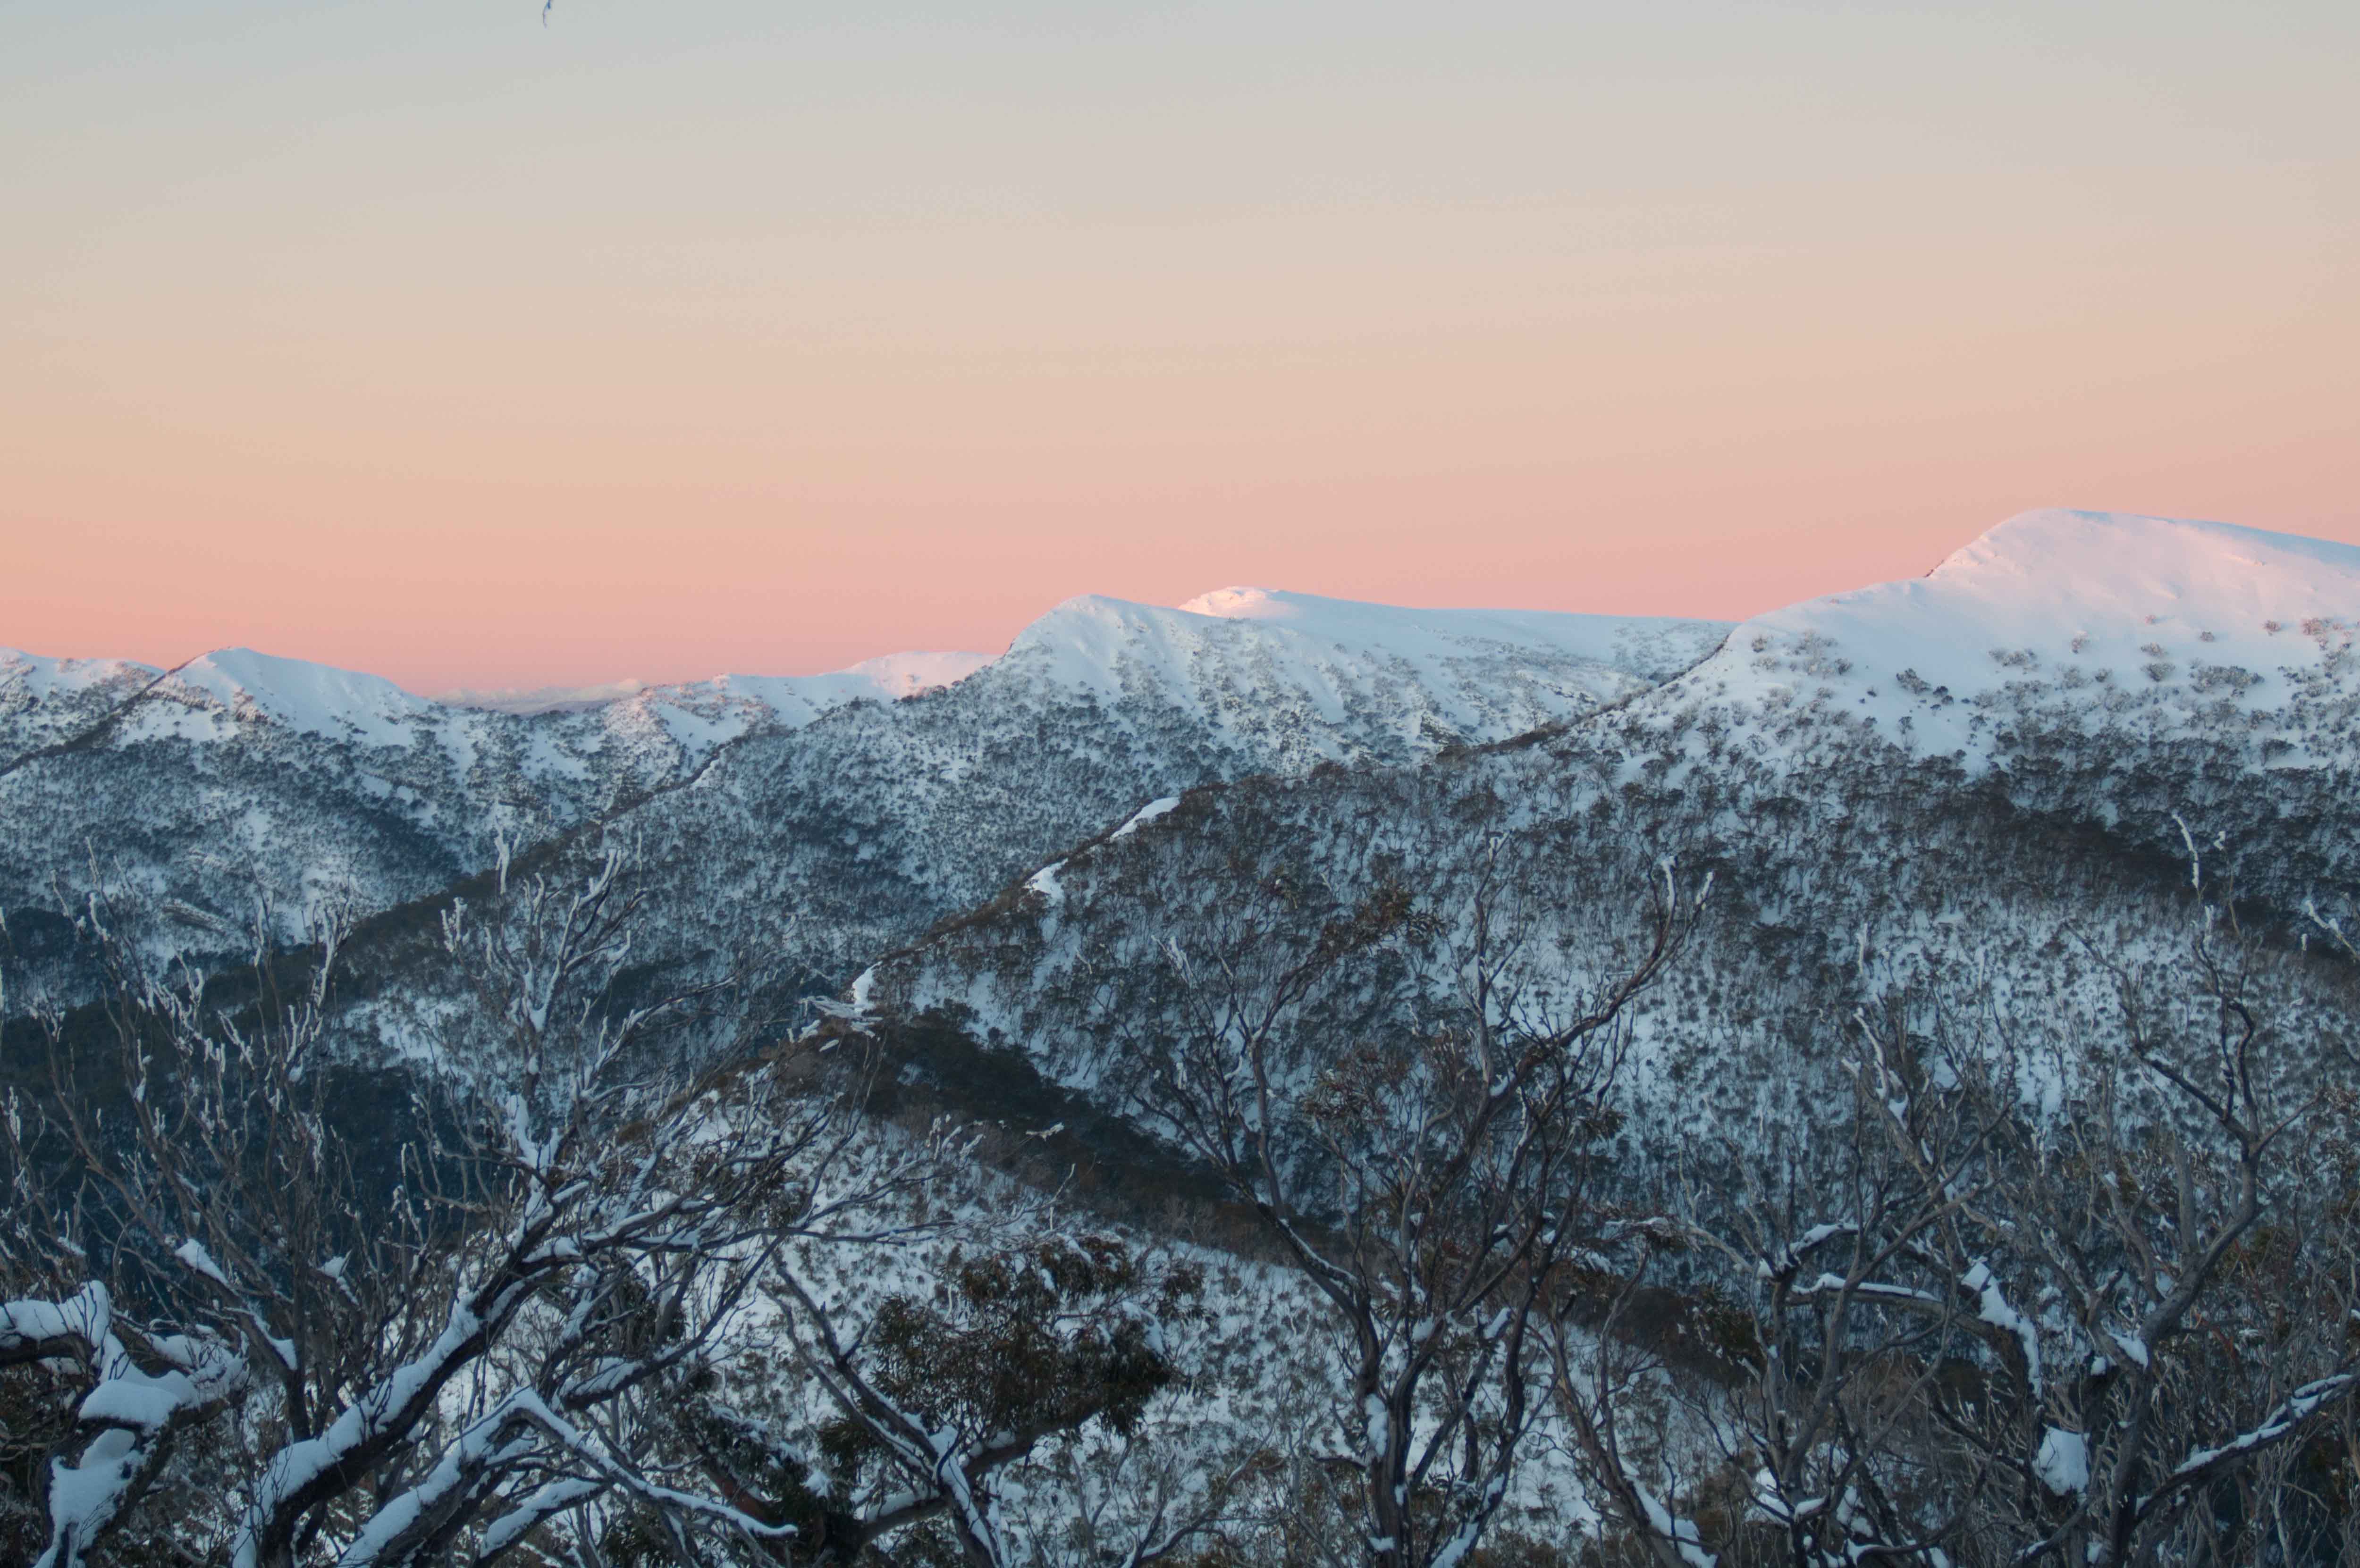
What we hadn’t heard in our earlier report before leaving was ‘Westerlies rising to severe gale’ the following day.  Not having experienced winds in the New Zealand Alps before we were a bit naive about what this meant.  We were soon to find out how ferocious wind can be in places like this.   It was a beautiful evening and the night was calm.

Ball Pass website -11
Day 2. Tasman Lake from camp 1 early morning. Click to enlarge.
Ball Pass website -13
View towards Malle Brun Range to the North West – from Camp 1. Click to enlarge.
Ball Pass website -14
A friendly Kea. Click to enlarge.
Ball Pass website -26
Not far to Kaitiaka Peak (left of Ball Pass) and Ball Pass (right to centre of skyline). Click to enlarge.

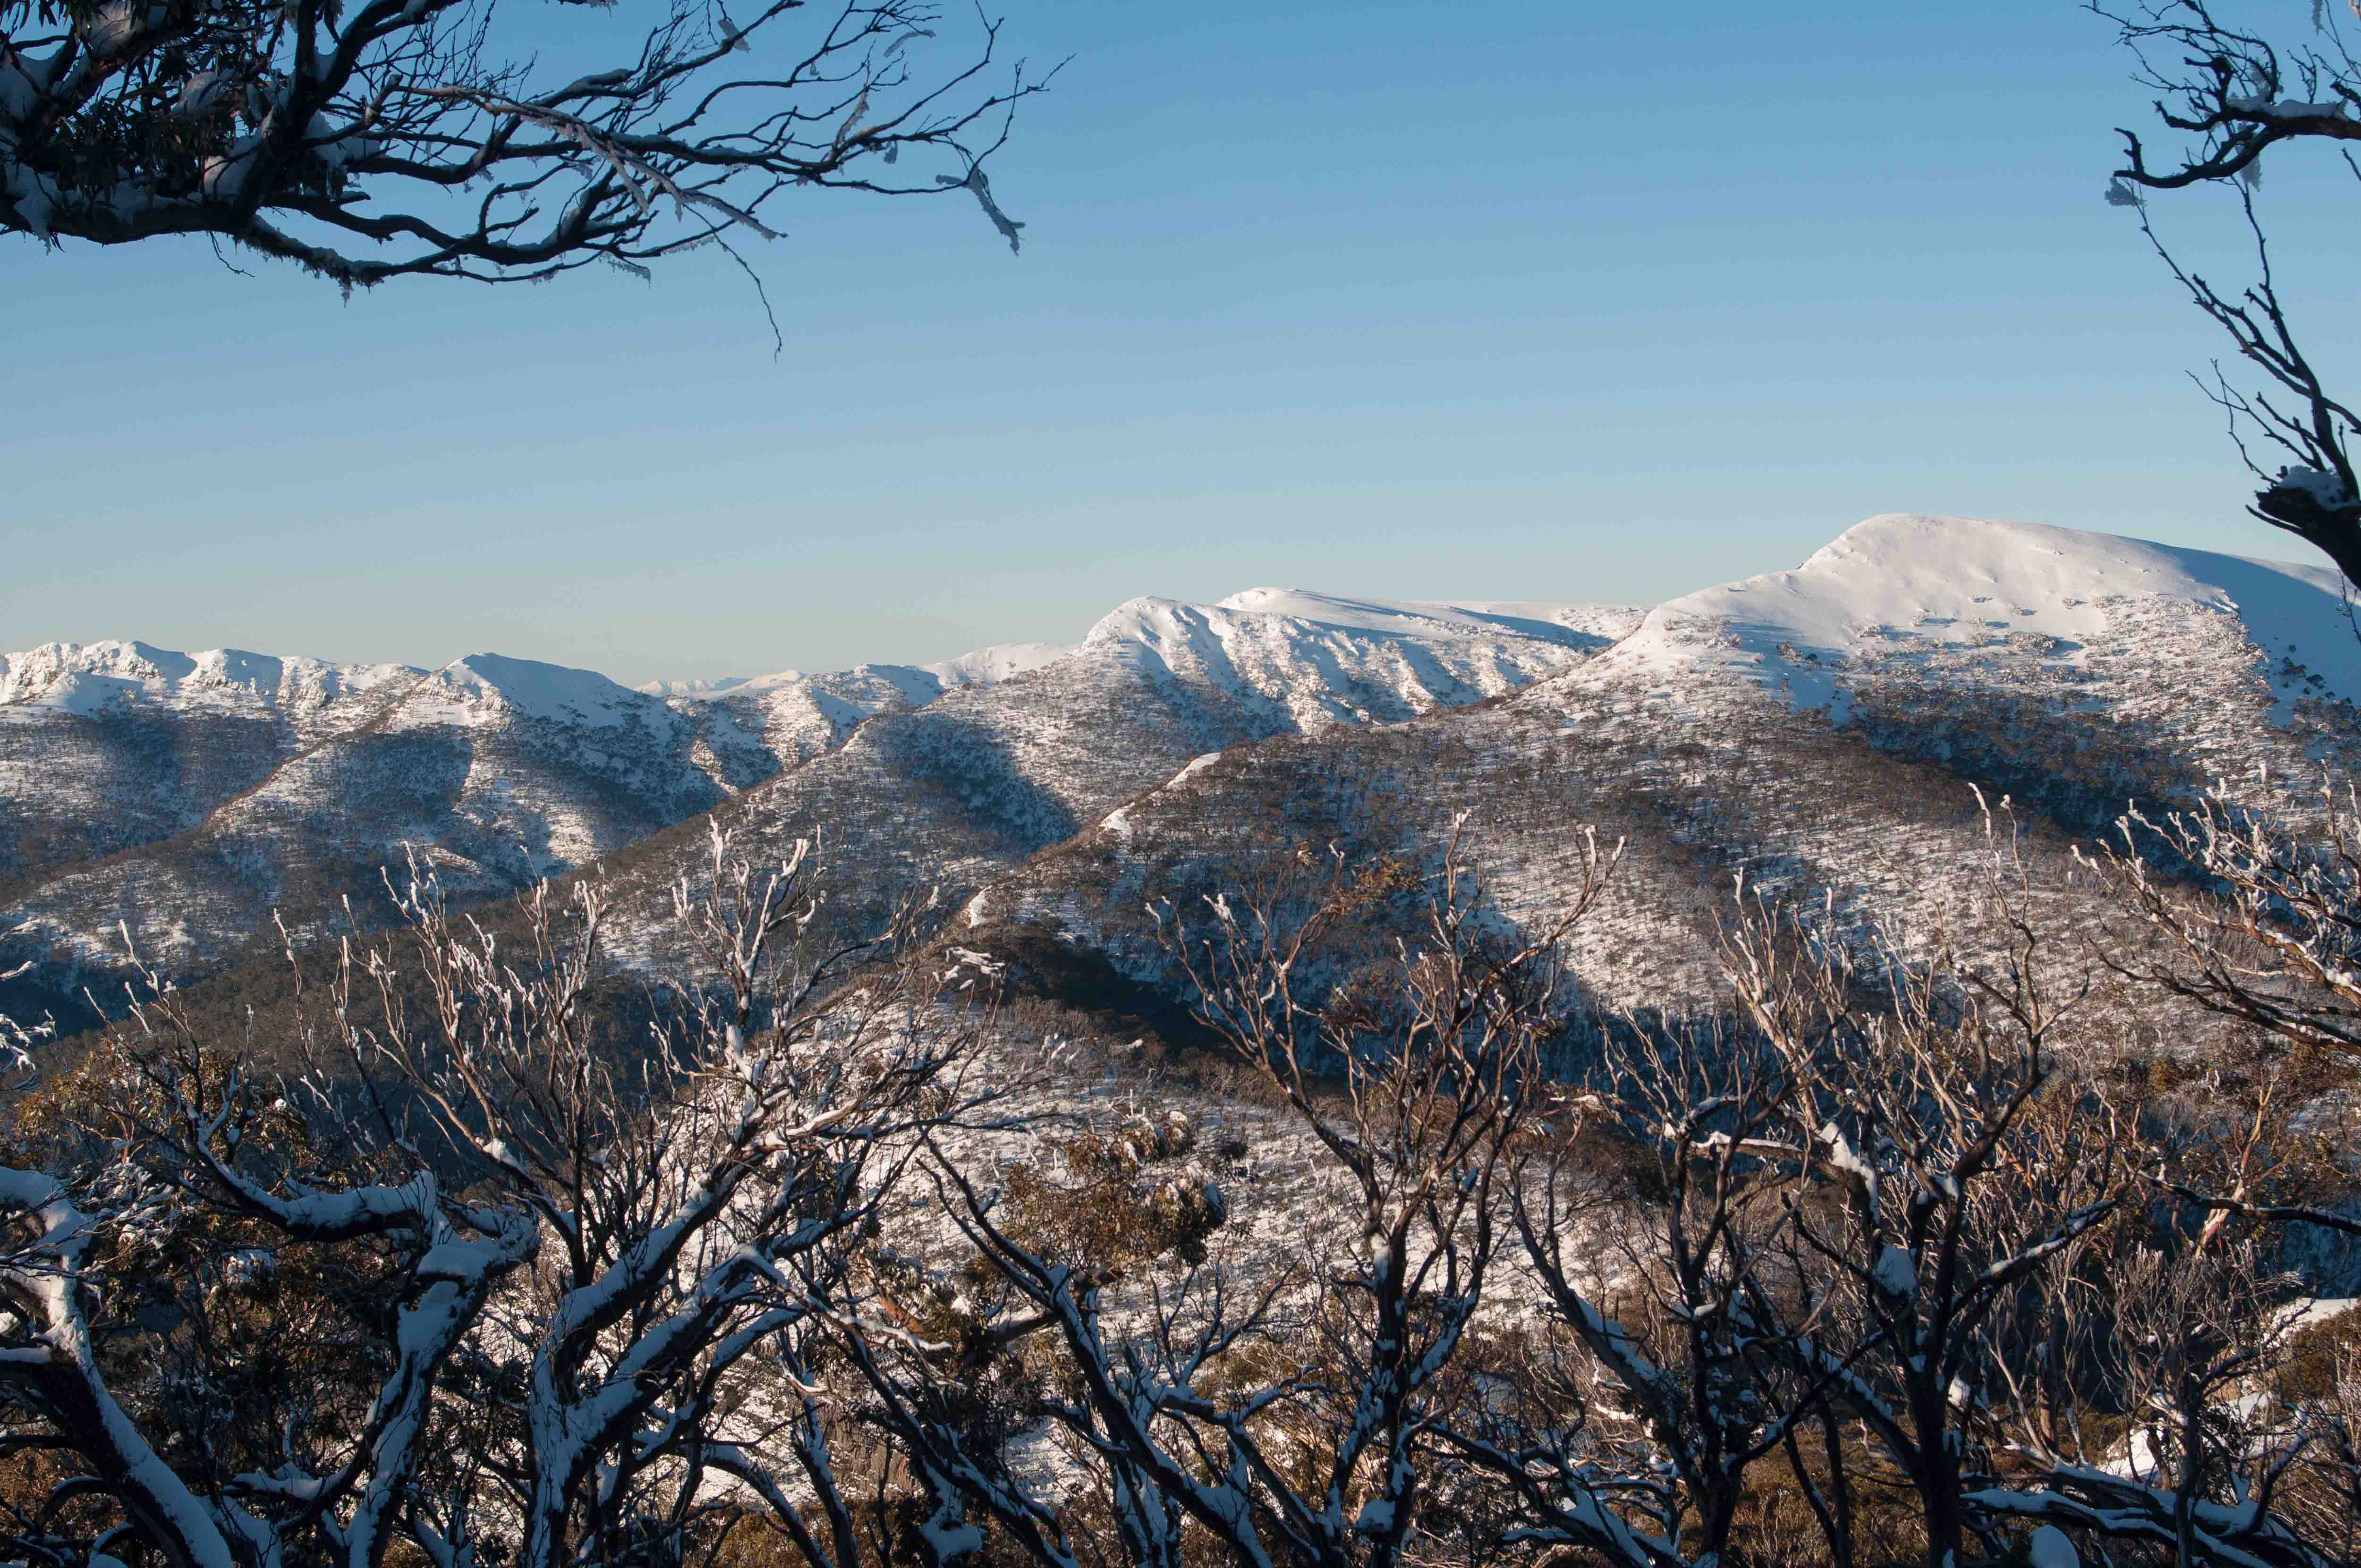
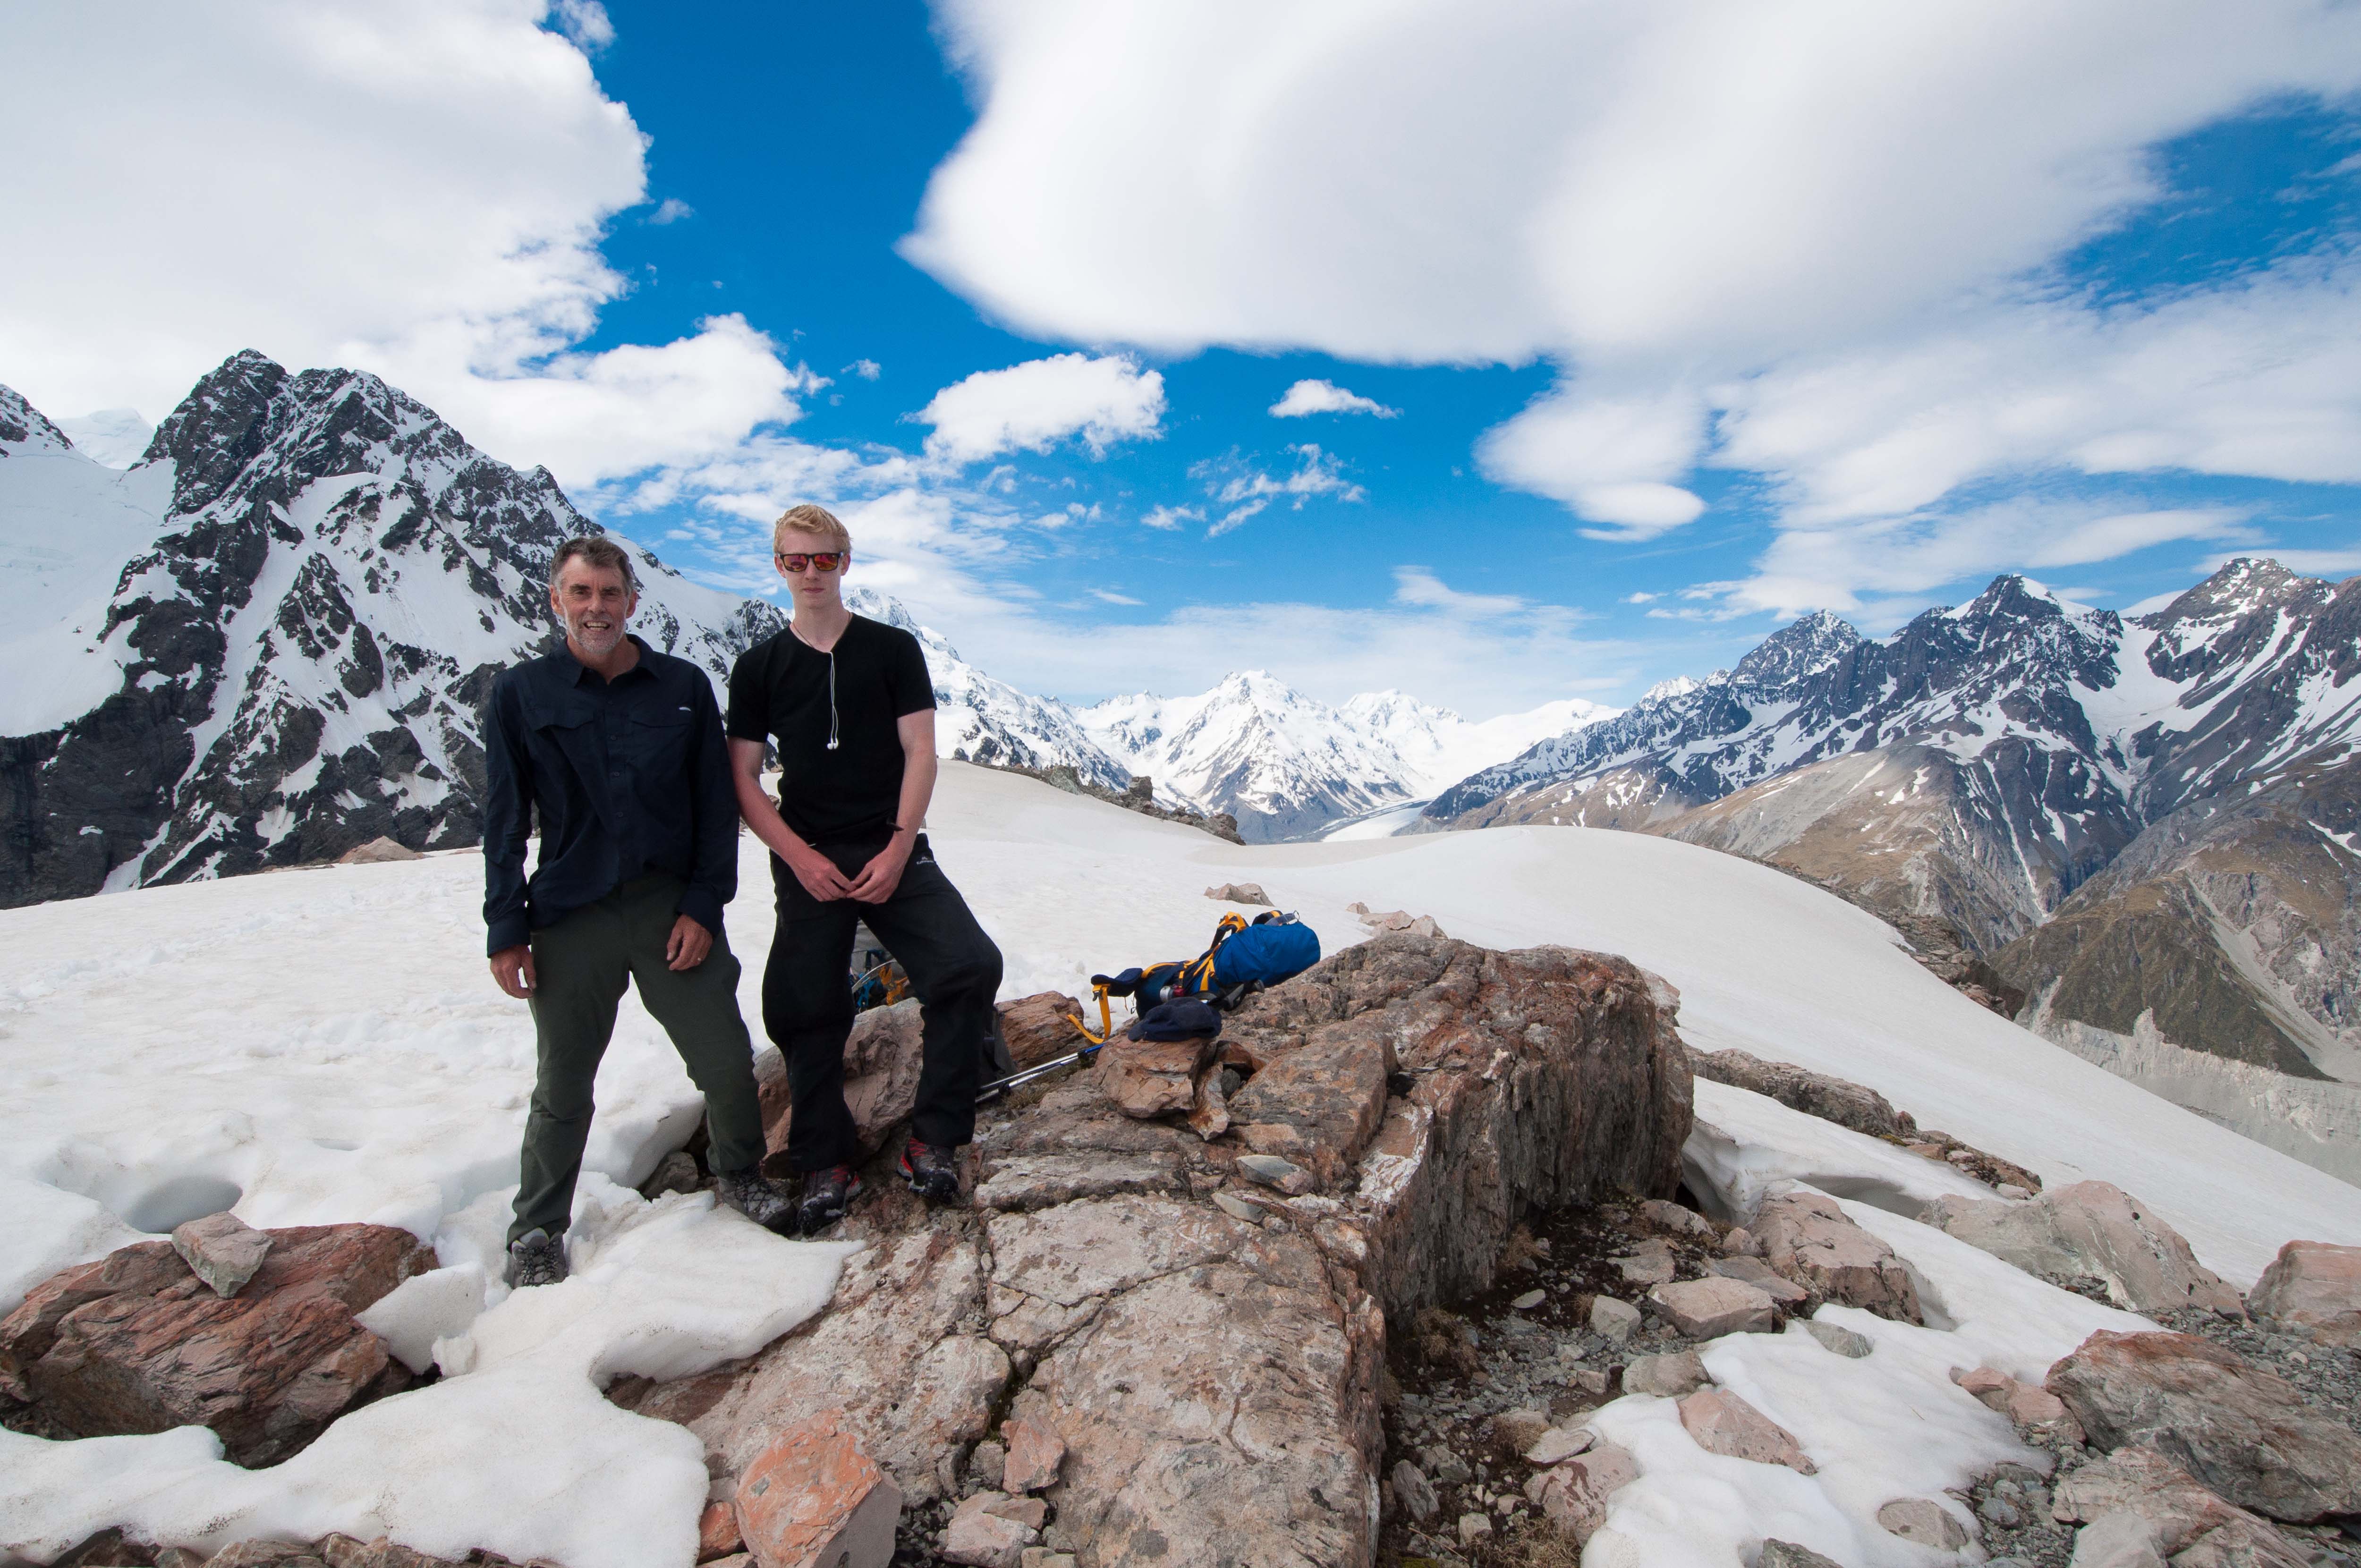
The next morning we were on the move soon after 7.00 AM and made it to the base of Kaitiaki Peak by 9.00.  To fulfil another objective we dropped our packs and took half an hour to quickly climb Kaitiaki Pk (2222m).  The Peak provided panoramic views of the surrounding Southern Alps. We then crossed Ball Pass at 10.00 AM (2121 m) and spent the next few hours sidling and descending around under Mounts Rosa and Mabel on the Hooker Valley.

Ball Pass website -16
Joe and me on top of Kaitiaki Peak (2121 m).

Ball Pass website -17

Ball Pass website -19
Joe descending Kaitiaki Peak towards Ball Pass. Click to enlarge.
Ball Pass website -20
Approaching Ball Pass. Snow covering glacier. Click to enlarge.
Ball Pass website -22
Me and Joe at Ball Pass (2121 m). 10.00 AM Tuesday 9 Dec 2014.

Ball Pass website -21

Ball Pass website -23
After crossing Ball Pass we headed down the Hooker Valley to the west. Click to enlarge.

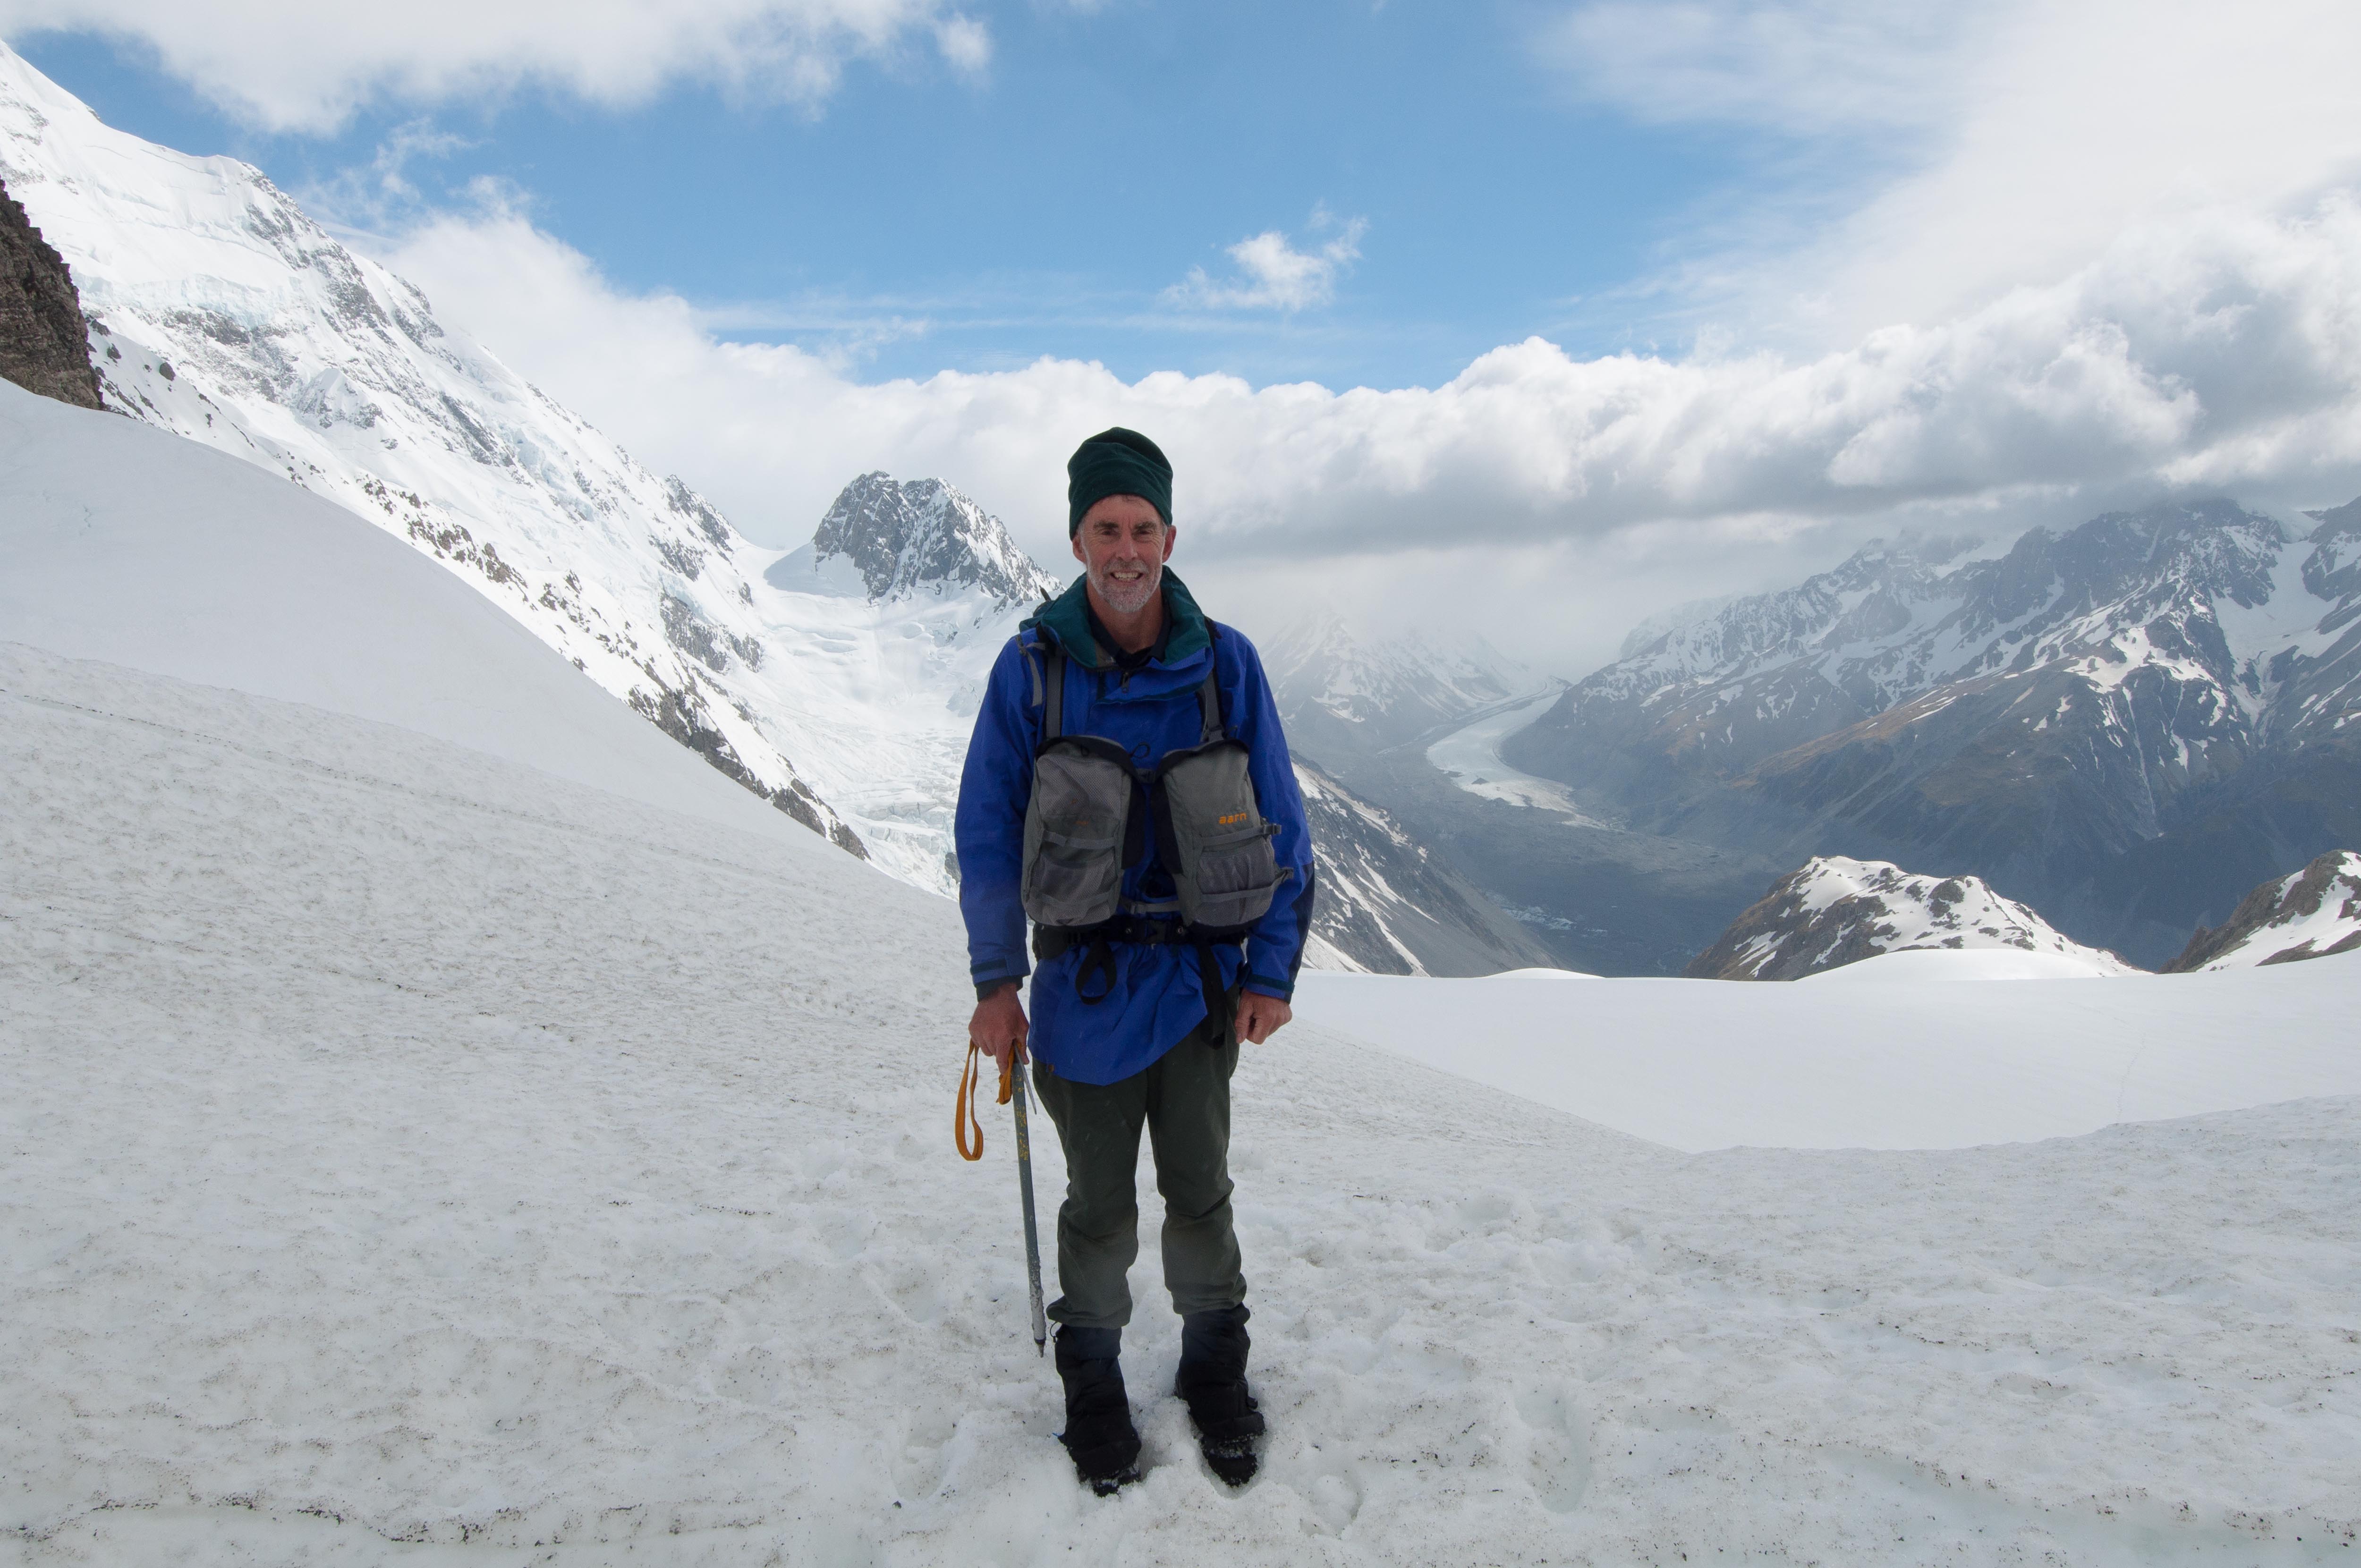
The snow was relatively soft and we were able to kick good steps so we didn’t fit our crampons, however the ice axe was extensively used as a third point of security by jabbing the pick into the snow.  The degree of slope on the route was often greater than a staircase and it was vital to have an ice axe to maintain balance and support.  The axe has a spike on the shaft end and on steep slopes and in the wind we drove it in deep with each step.   Self arrest with the spike wasn’t really an issue given the conditions as the snow was soft and we would sink well above our ankles.

Ball Pass website -24
Crossing the snow below Mt Rosa. Click to enlarge.

On our approach to the “Playing Fields” ,at just before 1.00 PM on our second day, we started experiencing the forecast strong wind.  At first we didn’t think much of it but the alpine environment soon unleashed its full fury.  I was at the edge of a boulder scree just about to cross a patch of snow at the Playing Fields when without warning a gust of wind threw me over backwards and somersaulted me onto my hands and knees.  I was lucky, apart from bruises on my right leg I was okay. Fortunately my pack protected my head as I went over.  I now know why many other walkers on this route wear helmets! What amazed me was the lack of warning before each gust of wind.  There was no sound of it approaching.  Winds of 100 km/hr are frequently recorded in the Southern Alps.  Winds associated with a nor’wester, also known as a foehn wind event, regularly exceed 140 km/hr. These winds can easily blow people off their feet.  The forecast ‘Westerlies rising to severe gale for a time’ had reached us.  I’d say what we experienced was a foehn wind event as the velocity was much more than I had ever experienced. The exposed saddle of this location didn’t help.  There was nothing we could do but shelter beside a boulder until the wind had subsided. It wasn’t safe to move at all.

Ball Pass website -27
Above the “Playing Fields” before the severe gail. Hooker Lake in background. Click to enlarge.

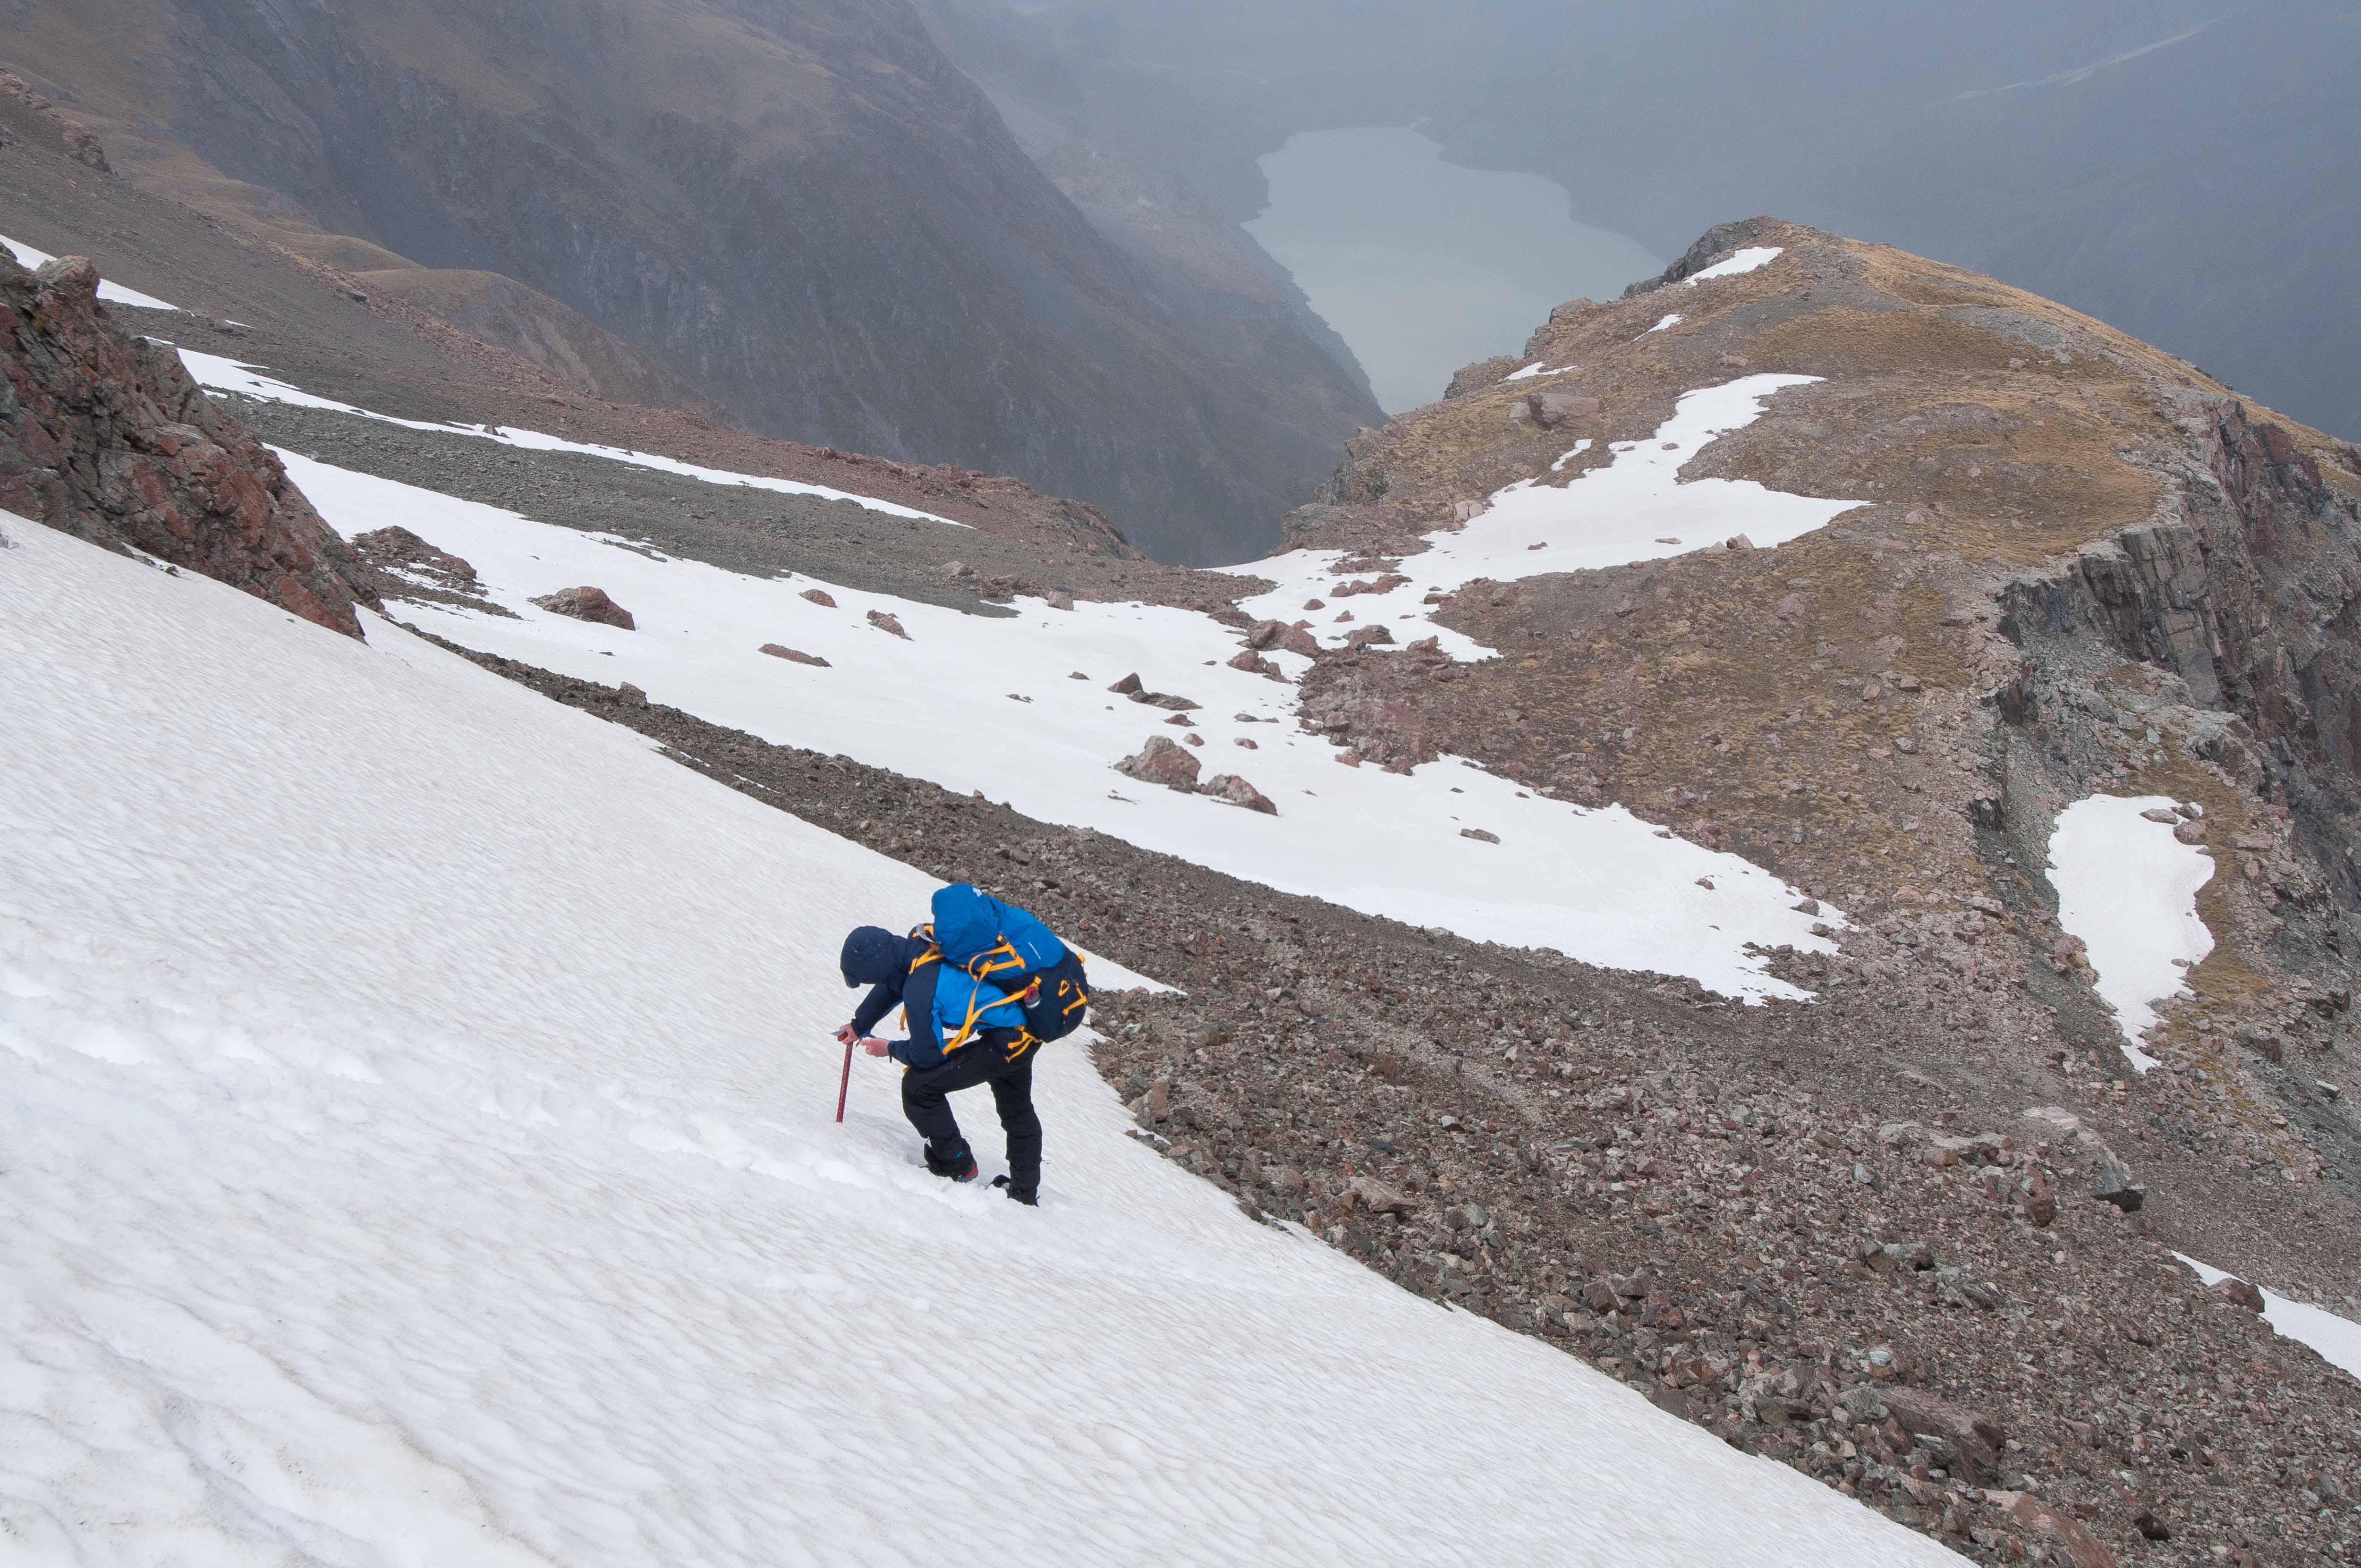
From this point we had about 500m of steep snow filled distinct gully to traverse with a drop of 400 m – ie a 40 degree slope.  There was no way we were venturing on that snow face in these conditions.  After an hour’s wait the force of the wind seemed to be decreasing so we plucked up enough courage to attempt the gully. There was no viable alternative route.  The ice axe was our best friend and was thrust in deep at every move to brace ourselves from the inevitable unpredictable gust.   The dissected gully offered some protection from the wind and by 3.30 PM we had arrived at our camp area for the second night – a shingle fan in the East Hooker Valley. It then started to rain but it wasn’t very heavy.  That evening several strong gusts shook the tent and stressed the main poles.

The next morning we were shrouded in fog and low cloud with drizzle.  We packed up and walked along the top of the Hooker Glacier moraine wall towards White Horse camping area.  Several side streams were deeply incised causing us to make detours.   We walked for 3 and a half hours on our third and last day.

Ball Pass website -25
Day 3. Above Hooker Lake. Click to enlarge.
Ball Pass website -28
View of Hooker glacier. Only three hours to White Horse camp ground. Click to enlarge.

Ball Pass is the ultimate of New Zealand hiking. It is quite an arduous trek and up there in terms of difficulty. If you’re fit and keen, you can do it.  With little or no mountaineering experience it wasn’t a problem, however you do need to have done lots of overnight hiking, be good on your feet and have a high level of fitness.  Obviously having the right conditions is also important. Rangers advised that we were one of the first people to cross the Pass this season.

The walk met most of Joe’s expectations. In terms of physical demand and duration it was more or less what he anticipated.  Joe was very fit prior to the trip and did not complain once about being tired or needing a rest.   He just kept on going.   Joe said that he was surprised by the amount of avalanche and rock fall activity across from where we were on the face of Mt Cook and how audible this was.  We were not in danger but this brought home the risks of climbing directly on Mt Cook and higher slopes.  Joe also said he was astounded by the extreme change of weather pattern and the severe wind on the second day.  What was scary was dropping down the last 500m of steep snow slope in the gully from the Playing Fields to our camp near the Hooker terminal lake during the afternoon when there were still severe gusts of wind.  Not knowing when the next gust was coming was the biggest issue.   Joe concluded in saying that it was an awesome and incredible trip.

We both learnt a lot, especially how quickly the conditions can change in New Zealand.

Stalking Sambar with a Camera, Sept 2014.

It was early spring. The days were getting longer and the snow was melting.  I decided it was once again time to venture into the untamed and remote parts of the Victorian high country to experience the awesome landscape, the resident wildlife and have an adventure.   Finding a paradise untouched by others is getting harder these days with more of us backpacking well away from roads and tracks.  My mission was to photograph Sambar deer.  It was my intention to get to a place where not too many hunters get to.  The Snowy Bluff Wilderness (part of Alpine National Park) located roughly between Licola and Dargo is such a place.

As well as being in wilderness, the rigors’ and self reliance of backpacking through rugged bush land adds to the experience of seeing wild Sambar in a breathtaking environment.

It is my intention to not provide exact details of the location.  One of the challenges of hunting is to explore new areas and discover for yourself a ‘special’ place.  I have few of these special places, all of which are on public land, and accessible by the intrepid person.

I first went to this particular area in 2010.  Back then after studying maps I identified a location that looked promising and intriguing.  The walk in wasn’t too difficult, as the shrubs and regrowth from the 2007 bush fires wasn’t overly thick.  After 2010 I returned in 2011, both times accompanied by mates (Cliff in 2010 and Cliff and Rod in 2011).  My first two trips were fantastic  and I was keen to return.

Snowy Bluff Sept 2014-1
Our camp site. Click to enlarge.

This time I was joined by Danny a keen deer hunter who chooses to hunt deer with a firearm and who likes the adventure as much as anything else.    Having responsible mates with firearms join me wasn’t a problem. We often go in separate directions from the camp site and hunt alone.   I wear a blaze orange high vis cap so I can be seen.  My hunting mates and I all love seeing Sambar and the country we were going to would be big enough to fulfil each other’s needs!

In my earlier years the first and foremost goal was to shoot deer.   However, photography has replaced my desire to shoot.   So for me the ultimate challenge and reward is taking images of wild deer.   I suppose I call myself a passive hunter – one who searches for and seeks out deer with the final act being the press of a camera shutter.

Outwitting and outsmarting an animal with an acute sense of smell and hearing, in their domain, is what I like best about Sambar hunting.   Successfully photographing wild deer by manually operating a camera is trickier than shooting deer.  I am reliant on the animal staying in position long enough for me to focus.  There is every possibility that the animal will be moving and I will miss out on getting a photo.  All it takes is a crack of a stepped on stick at a considerable distance, often more than 100 metres,  and the animal is alerted and fleeing.

This would be a three day trip so we need not worry about packing dehydrated or freeze dried food.  The bare essentials would do – we would basically carry pasta for carbohydrates and chocolate for energy.  Because safety was a primary concern in this rugged and remote country we would carry adequate first aid items and a personal locator beacon.  The accommodation would be a fly and bivy bag for Danny and a One Planet Gunyah tent for me.  At less than 1.2kg respectively this was considered lightweight camping.   With Danny carrying his 30-06 centrefire and me with my digital SLR Nikon, a 300mm lens and a Gitzo tripod we were evenly packed.

After the walk in, and pitching camp, we got the bino’s out and a had a good glass around.  Ten minutes later Danny picked up a good size Sambar stag on the opposite face.  It was thought to be about 700 metres away as it walked along fairly open country slowly descending at right angles to us towards the river.  My range finder only operated out to 500m.  At this distance we estimated the stag had a 25 inch head (width of antlers).

At 700 approx. metres
Stag spotted from camp. At approx. 700 metres
At 700 approx. metres
At approx. 700 metres
At 600 approx. metres
Image cropped. 

With not much daylight left Danny was content to stay put so I thought I would drop down from the campsite in an effort to get a closer picture.  With two hours of daylight left and the extremely difficult terrain there was no way that I was going to get very close to this animal that afternoon, however a potentially closer photo was possible. Because we were camped high up on the side of a hill I used my GPS to mark a waypoint ensuring a quick return to camp.

I descended at an angle towards the stag, stopping every few minutes to keep track of it as it moved along the face.  All of a sudden I put up a couple of young spikers directly in front of me. With a clatter of hooves they both charged off.   I had been so focussed on the stag across the gully that I wasn’t watching out for animals ahead!  I continued on.  After 20 mins of both making an angled drop the stag decides to change direction and move slowly back uphill into heavy cover.  I was still over 500 m away with a big gorge in between me and it so the stalk was over.   That’s deer photography.  You can never count on a close encounter with a Stag. It is a very rare experience.

A concern in this country is the availability of water as we would be camping and generally hunting well above the river.   I was half way down to the river so I decided to drop down and fill up my water bottles.

120 m
Two young Sambar stags (at 120 metres). Note the bottom stag had one antler cast.  Click to enlarge. 
120 m
Click to enlarge. 

There was good fresh sign everywhere so I kept my eyes peeled.  I soon picked up a couple of young deer  just across the river. I stalked to within 120 metres, sat and watched two spikers feed in the fading light before dusk. It wasn’t possible to get closer without crossing the river in full view and spooking the animals.  I quietly observed them feeding while taking a few photo’s.

120 m
Click to enlarge. 

Sunset in September is at 6.00 PM.  By 6.20 there was insufficient light for further photo’s so I started my climb back up to camp.  With a bit of help from my head torch I arrived back at camp at 7.00 PM to rest in front of a camp fire with Danny, have a meal and talk about the day’s events.

Snowy Bluff Sept 2014-5
Deer were seen in this area early in morning. Click to enlarge.

The next morning we picked up some deer through the bino’s a good distance away but as far as we could tell there were no stags amongst them.   They were moving amongst the trees and shrubs.  Anyhow we decided to get closer and spent the next hour closing the gap.  As often is the case, by the time we got within a 100 metres from where we had last seen the deer there was no sign whatsoever – they had disappeared.    For the rest of the day we walked and glassed high and low seeing a few deer but they were all moving and too far away for a stalk.

Snowy Bluff Sept 2014-2
Danny glassing for deer. Click to enlarge.
Snowy Bluff Sept 2014-4
Another gully to stalk.  Click to enlarge.
Snowy Bluff Sept 2014-3
More country to search. Click to enlarge.

We covered a fair bit of ground that day and saw some nice country but I did not get any opportunities for good photo’s. The highlight was probably disturbing a small Sambar calf lying concealed in the grass only 10 metres away and watching it awkwardly run off.  It was too quick for a sharp photo.

We filled our bottles with water and headed back to camp.  The next day it was time to pack up and head back to the road and our vehicle.

Snowy Bluff Sept 2014-6

Snowy Bluff Sept 2014-7

Danny and me on the way out.

Walking out of country like this with our packs and camping gear requires a good level of fitness.  There are steep ascents and descents with obstacles such as rocks and unstable ground to contend with.  We were exhausted by the time we finally made it back to the car. The physical demands and subsequent fatigue are all part of the hunting experience.  It was an excellent hunt in an inspirational area.

Cape Liptrap Paddle

On Saturday 22 November 2014 four of us launched at Walkerville South (Sth Gippsland, Victoria) for a day paddle to Cape Liptrap and return. The forecast was good with light winds and a top of 31 C.

Walkerville South has some interesting history.  There are relics of the lime industry (early 1900’s) including ruins of kilns in the cliffs.

Not having paddled in this area I was to discover that there were lots of natural features along the coast including rock platforms, pinnacles, steep cliffs and sea caves. Much of it is protected in the Cape Liptrap Coastal Park.

Cape Liptrap copy

Map showing our paddling route from Walkerville South to Cape Liptrap.  Total 26 klms return. Click to enlarge.

Cape Liptrap-1

Me, Nathan, Ken and Steve.  Ready to go. Click to enlarge.

Cape Liptrap-2

Steve paddling through a channel at high tide under Bird Rock -only a short distance from Walkerville South. Click to enlarge.

Cape Liptrap-3

More cave like entrances further along the coast. Click to enlarge.

Cape Liptrap-4

The water was clear at the Cape- a good opportunity to see whats below.  Ken watching Nathan as he checks out the under water scenery (through a pair of goggles).

Cape Liptrap-5

Ken’s turn.

Cape Liptrap-6

Time to come up for air. No seals yet but promising habitat.

Cape Liptrap-7

Rocky outcrops off Cape Liptrap.  There must be seals around here somewhere? Click to enlarge.

Cape Liptrap-8

Seals sighted ahead. Click to enlarge.

Cape Liptrap-9

Views of the Cape and lighthouse.  The lighthouse was established at Cape Liptrap in 1913 to improve the safety of coastal shipping. The light is still in operation and has a range of 18 nautical miles (over 34 kilometres). Time to turn around for our paddle back. Click to enlarge.

Cape Liptrap-10

On the way back we stopped for a cuppa at an old boat wreck. Click to enlarge.

Cape Liptrap-11

Time for some fun.  Steve checking out a wave forming as the seafloor gets shallower by a rock shelf. Click to enlarge.

Cape Liptrap-12

Nathan having  a ride. Click to enlarge.

Cape Liptrap-13

Nathan feeling adventurous again. Click to enlarge.

Cape Liptrap-14

An idyllic setting. Wilsons Promontory National Park across the Bay in the background. Click to enlarge.

Cape Liptrap-15

After we had our play it was time to paddle back to the cars. Click to enlarge.

This is a very scenic piece of Victoria’s coastline.  A fantastic day had by all.

Photographing wild deer

I have always had an interest in photographing Australia’s wild free roaming deer and have spent many hours stalking them with a camera.

What I like most about photographing deer in the wild is trying to outwit and outsmart these amazing animals with their acute sense of smell and hearing, and being part of the inspiring environment where they live.

Excellent photo’s can be produced by infra red or movement activated trail cameras set up on game trails or wallows but this is not the same as taking a photo of deer by stalking with a camera.

This involves patient hours of quietly walking through the bush or picking my way along steep rocky slopes with a tripod over the shoulder or carried beside me ready for setting up should an animal show itself.  It only takes about five seconds to position the tripod, loosen the friction of the ball head, locate the animal in the viewfinder and lightly activate the remote shutter button for automatic focus, and if the deer is still there take a photo.  However five seconds can be a long time.  If the deer identifies you it will very likely run at first glance.  If it is unsure of what has caused the noise and movement it may remain while you are ever so slowly trying to go through the motions of preparing for a photo.

My camera gear consisting of a Nikon body with telephoto lens mounted on a carbon fibre gitzo tripod roughly weighs approx.  4.5 Kg.   With tripod legs extended it doesn’t make for easy walking .   I try and keep the tripod legs extended so when I spot a deer the camera is at head height, or when stalking in the open or amongst low vegetation I shorten the legs to a couple of feet to comfortably look through the viewfinder in a kneeling position.   I have found that the correct height is very important after having to freeze in whatever position I may be in at the time the deer is looking my way and remaining in that position for however long it takes.    Sometimes the deer focuses on me when I’m not properly set up.  At moments like this it is difficult to decide whether to freeze and hope the animal will resume feeding or very slowly make adjustments to the tripod to get the right height or move the lens out of the way of an interfering branch and hope the deer is still there to get a picture.   Often I am in an awkward position and realize the risk of getting more comfortable would jeopardize my chances of further photo’s.

I have found that a tripod enables me to produce sharper images when using telephoto lenses particularly in sambar habitat where there is an often very low light beneath the canopy.   It also increases the time I can take pictures at both ends of the day.  I can successfully capture images at first light and towards sunset.  The natural landscape and vegetation may not be as saturated in colour at this time of day but is important to be in the field then with your camera then as this is the time of the day when the animals are moving and are most active.   Many of my pictures were taken at shutter speeds less that 1/20 second shutter speed.  Using a 300 mm lens there is no way I could effectively hand hold a camera, even with an image stabiliser lens, and get a sharp picture.  Without a tripod I would be limited to good light conditions with fast shutter speeds using low powered lens.   The image stabilizer technology offered by Nikon, Canon and other leading brands does reduce camera shake but does not fully replace a need for a tripod when photographing forest deer.   With slow shutter speeds I have to pass up moving deer . Recent camera technology has allowed me to increase shutter speed in low light conditions by increasing the ISO setting.

I find photographing these majestic animals extremely challenging, satisfying and rewarding.

Here are a few of the images of the different species that I have taken over the years.

Sambar (click to enlarge)

Sambar2Sambar3Sambar1

Red Deer (click to enlarge)

Red 1Red 2

Hog Deer (click to enlarge)

Hog 2Hog 1

Rusa Deer (click to enlarge)

Rusa 1Rusa 2

Chital (click to enlarge)

Chital 1Chital 2

Fallow (click to enlarge)

Fallow 1Fallow 2

Sea Kayaking around Snake Island – April 2014

Snake Island is the largest of a number of barrier islands situated within the Nooramunga Marine and Coastal Park, South Gippsland, Victoria.  It protects a large sea grass embayment from the pounding waves of Bass Strait.  To the west of Snake Island lies the rugged Wilsons Promontory National Park.

One of the main reasons I took up sea kayaking in early 2013 was to experience our amazing coast with minimal impact and in close contact with nature whilst adding a sense of adventure at the same time.  An opportunity came in April 2014 to do an overnight paddle to Snake Island with Steve who is also a keen kayaker.   I first met Steve the year before when camping at Tidal River and we have had many enjoyable paddles together since.

The forecast was for 15 knots of south westerly on our paddle out with improving conditions the following day.  The tide and wind were favourable so it looked good for circumnavigating the Island.   This would be my first overnight expedition. I could be generous with food and other items as my kayak held about three times more than I could carry when back packing.

Snake Island copy
Click for larger image.

Map showing Snake Island.  Note it’s proximity to Wilsons Promotory National Park.  We paddled in a clockwise direction. (click to enlarge).

DAY 1

Snake Island Apr 2014-2
Click for larger image.

20140415-DSC_1882 20140415-DSC_1883

After a comfortable 16 kilometre paddle from Port Welshpool we arrived at the far end of Snake Island near Port Albert entrance (opposite Clonmel Island). Steve above and me on the right.

Snake Island Apr 2014-3

Our campsite. Steve likes to travel in comfort -note the chair.

Snake Island Apr 2014-1
Click for larger image.

Looking out to the Bass Strait on our first evening.  We were hoping that the wind would drop so we could paddle out the entrance the next day.

DAY 2

Snake Island Apr 2014-5
Click for larger image.

Fortunately the wind dropped so we paddled out the entrance. Getting out between Snake Island and Clonmel Island was easy.  Getting across the numerous sand bars was more tricky. As we turned west it became a bit unnerving for me as there was the odd white crest from breaking waves directly in front of us and stretching a few kilometres out to sea.  We could have stayed in the channel until we got well clear of the sand bars at the entrance but this would have taken us further out to sea and added distance to our trip.  We thought it would be safe enough to weave in between the rough sections.  However the moving tide and currents were constantly changing the surface conditions making things a bit unpredictable.  We were on full alert for fast forming waves.   On one occasion a wave was nearing vertical as it approached me.  I had to take fast action.   I picked up my cadence and and managed to climb over its face just in time.  Steve was paddling 20 metres abreast in the way of the wave after it left me and I thought he would get hammered. I then heard it crash expecting Steve to be swallowed in its mass but a few moments later he shot out from the spume at its end with a big sigh of relief.  Fortunately the  wave was relatively short.

Snake Island Apr 2014-4
Click for larger image.

Past the tricky section. Steve in front making out way along the coast with the Prom in the background.

Snake Island Apr 2014-6
Click for larger image.

Time for a stop on the beach at Corner Inlet Entrance.

Snake Island Apr 2014-7
Click for larger image.

After a rest we were back in the water to resume our paddle to Port Welshpool arriving mid afternoon.  It wasn’t as difficult negotiating the Corner Inlet entrance.

Overall we paddled 46 kilometres (30 klm the second day).   It was a great experience which has given me an appetite for further trips along this beautiful coast of ours.  What better way to spend a couple of days?

Towards Mt Howitt – Winter 2014

It was mid July 2014 when my son Joe and I set out on an overnight  snow shoe walk in the Victorian high country.  Our destination was Mt Howitt, one of the most scenic places in the Victorian Alps which we had previously only walked to in summer – as a day walk from the Snowy Road carpark.  But as we would find out the trip in winter was much more challenging and required more time than we had planned for.  From mid June to the end of October the abutting four wheel drive network (from all four directions) is seasonally closed to vehicles, much of which is under snow for a number of months.  The maps showed that there was no real quick access to Mt Howitt during the peak of the snow season and that the nearest trail head is up to 30 klm away.  After assessing the options we decided to walk in via Bluff Hut on Bluff Track.

Visiting a fairly remote area of the Victorian high country in winter would be a new experience for us.  There had been an unusually large dumping of snow in late June and July this season which had transformed the alpine landscape into something that beckoned us to explore.  Late on the Friday we drove through Mansfield, Sheepyard Flat and up the Howqua River to the seasonally closed gate on Bluff Track (at Bluff Link Rd) where we parked our 4 wheel drive.  The next morning after a night in our swags on half a foot of snow, we donned our packs and MSR Evo snow shoes and set off for Mt Howitt.

As it turned out we under estimated the time it would take to get to Mt Howitt and made the decision to turn around at the half way point (at 14 kilometres).

Mt Howitt map 2 copy
Click for larger image.

Map showing route walked.

Day 1

Not far into our walk near Bluff Hut.

Click for larger image.

Looking back towards the Bluff.  Our walk was along a four wheel drive track which was mostly obscured, as it was deeply buried by snow, causing us to follow the GPS at times and keep to the ridge.  There was no sign of other visitors.  Apart from a few cross country skiers based at Bluff Hut we had the place to ourselves.  The forecast was for good weather.

After about 8.5 kilometres we arrived at Lovicks Hut for lunch and a rest. Alt. 1477 metres.

After losing the track for a while we eventually found it again as we headed towards Picture Point.

It was mid afternoon and we realised that we were not going to achieve our objective of reaching Mt Howitt in the three days that we had free.   After snow shoeing for over 14 klm we called it a day.

We located a nice protected site for the tent near Picture Point at 1640 metres elevation. It was a cold night but we kept warm in our thermals with lots of layers.

Click for larger image.

The view close by our camp site was magnificent. L to R – Crosscut Saw, Mt Howitt, Mt Magdala. Click for larger image.

Click for larger image.

At sunset. Click for larger image.

 Day 2

The next day on our return.  Mt Lovick in background. Another fine day.

Click for larger image.

On the way back we took a short cut across the face of Mt Lovick.  Walking along the exposed face was a great experience.

Joe at 1680 metres.

4 Looking east torwards The Long Spur
Click for larger image.

More awe inspiring winter scenery as we descended to Bluff HutLooking east towards The Long Spur.  Click for larger image. Even though we didn’t make it to Mt Howitt it was a thoroughly enjoyable trip.  We intend to return next winter and allow 4 – 5 days so we can hopefully get to Mt Howitt!